Introduction
With the final project, i decided to make a hydroponic planter that will control the humidity of the environment inside it, this project will utilise all the design and fabrication skills i have learnt prior to this, and will utilise
- 3D Printing
- Laser Cutting
- Arduino Microcontroller Programming (C++)
Conceiving the Idea
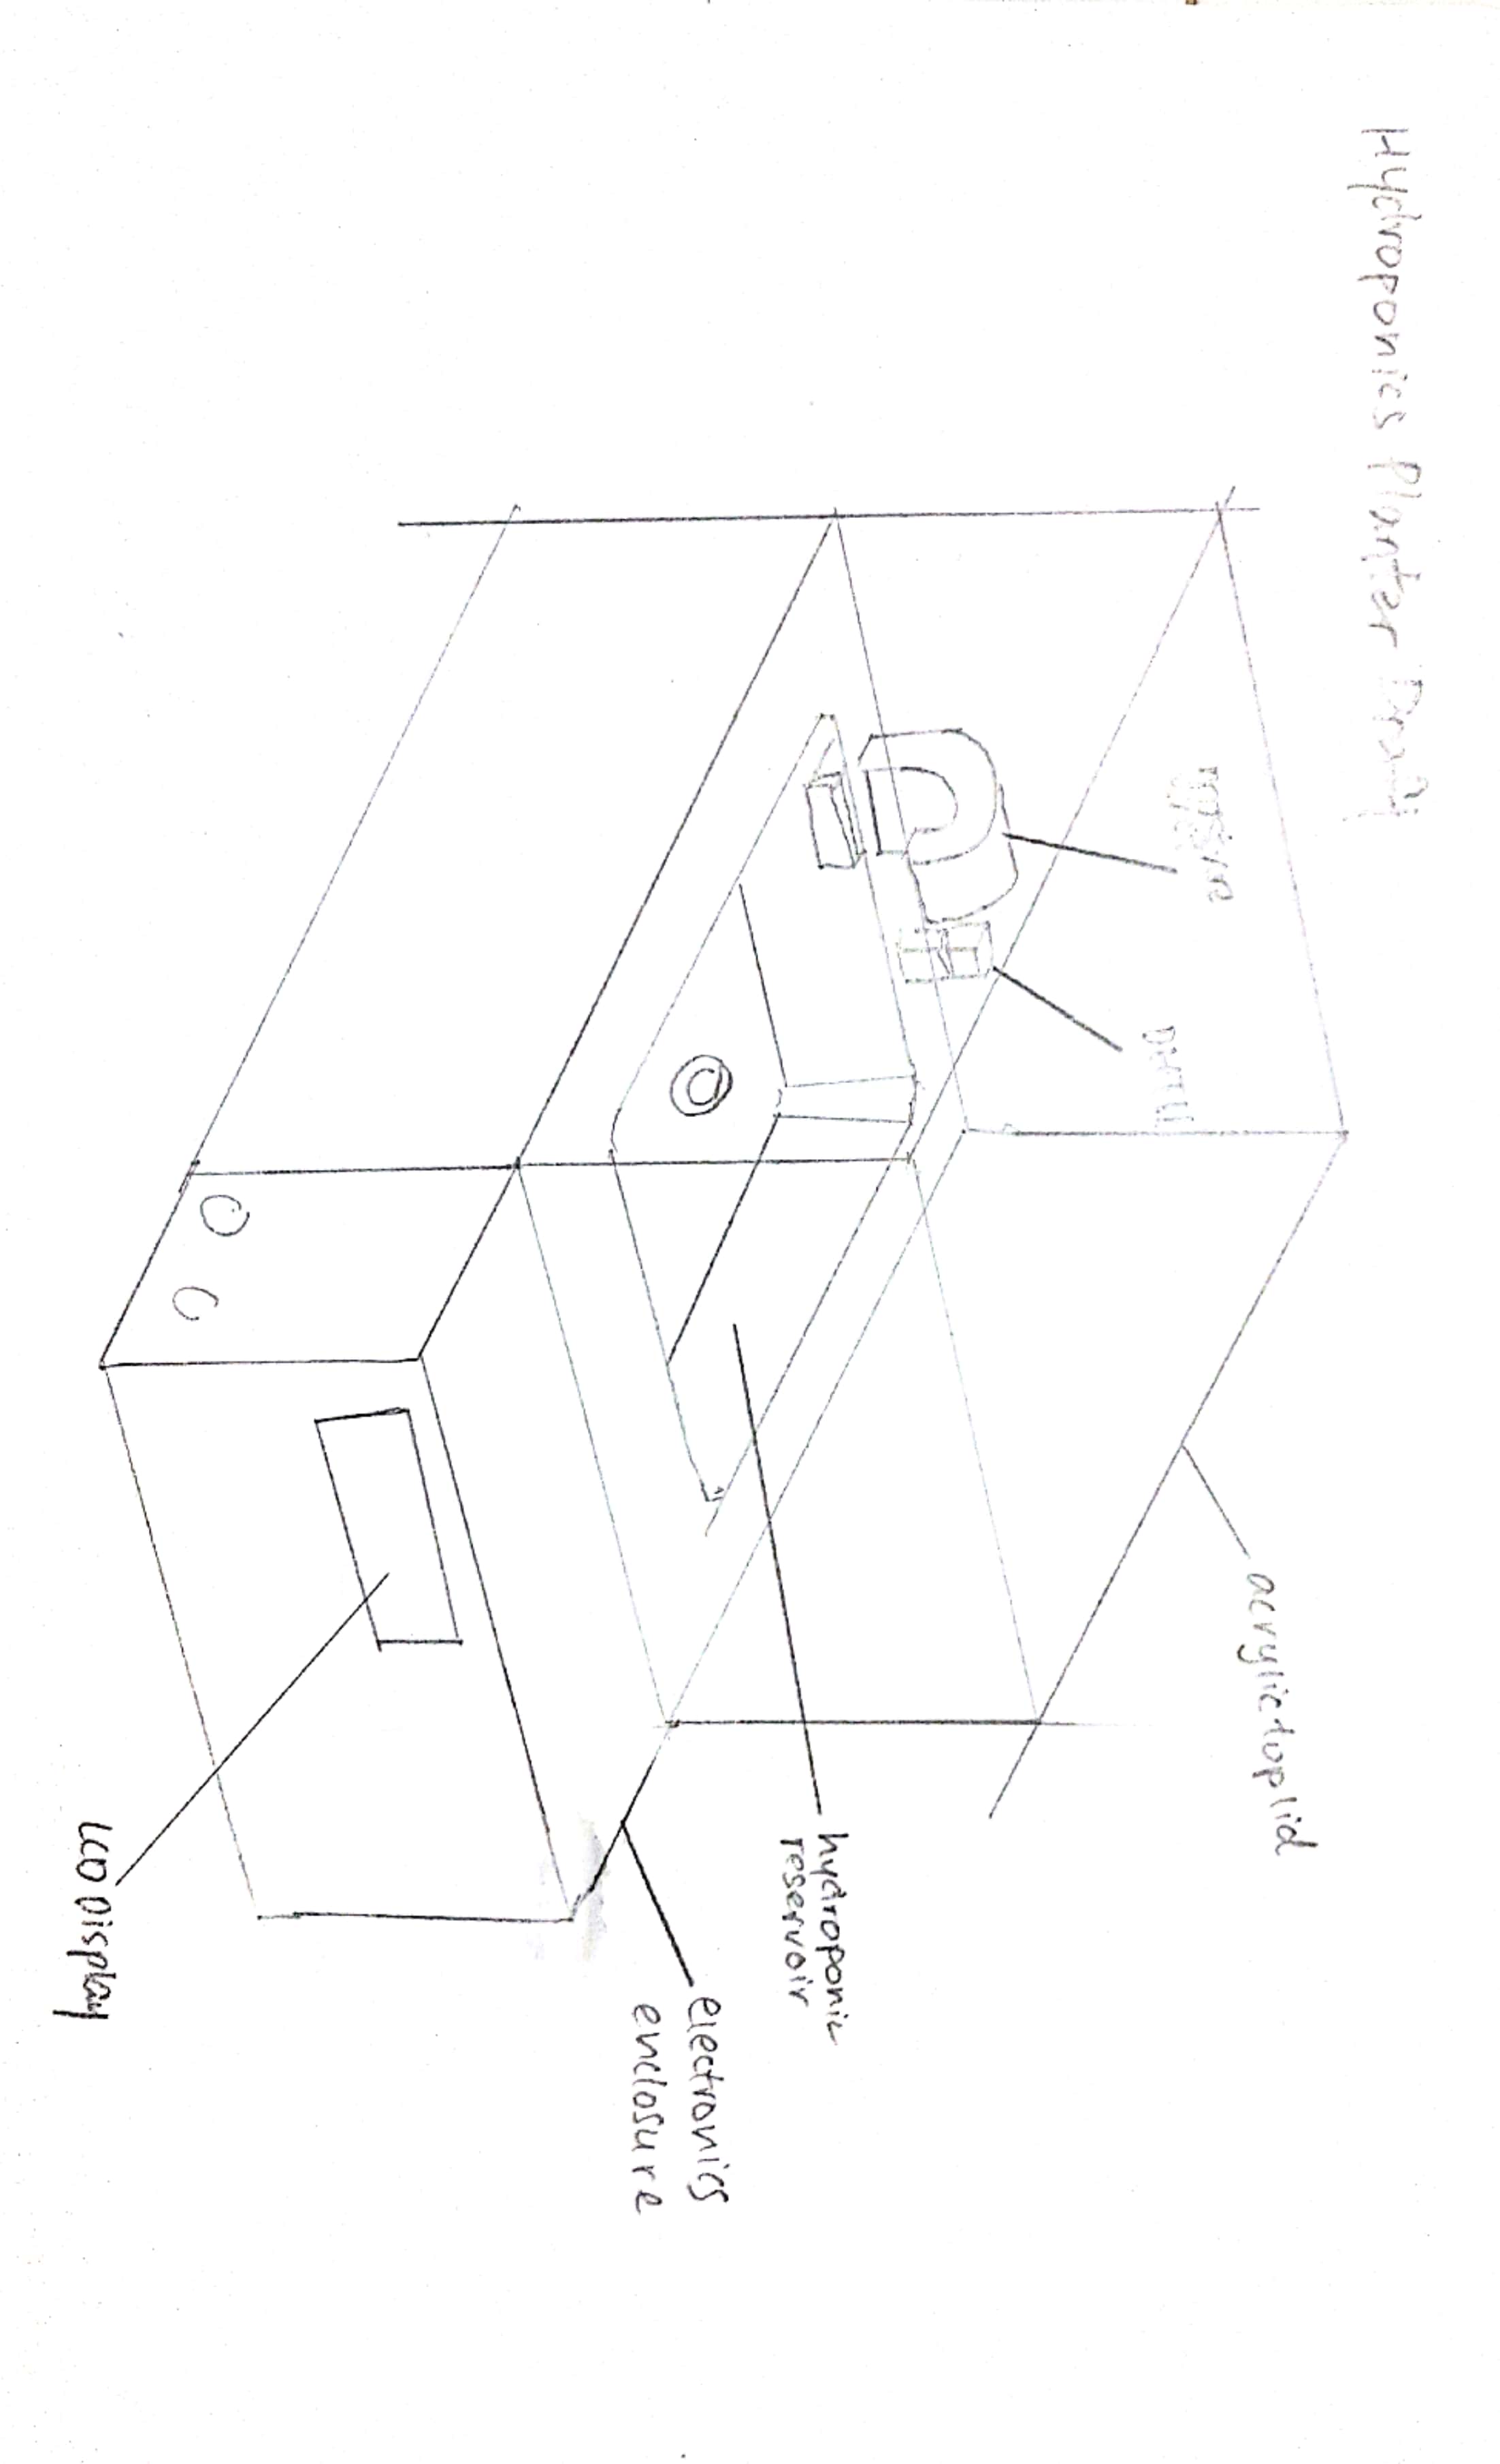
Before the project must be started , i first sketched out several designs that i wanted to build. After Discussing with the lecturer the feasability and parts selection for the project, the lecturer gave me the green light and i started designing
The image below showcases how the humidifying system works
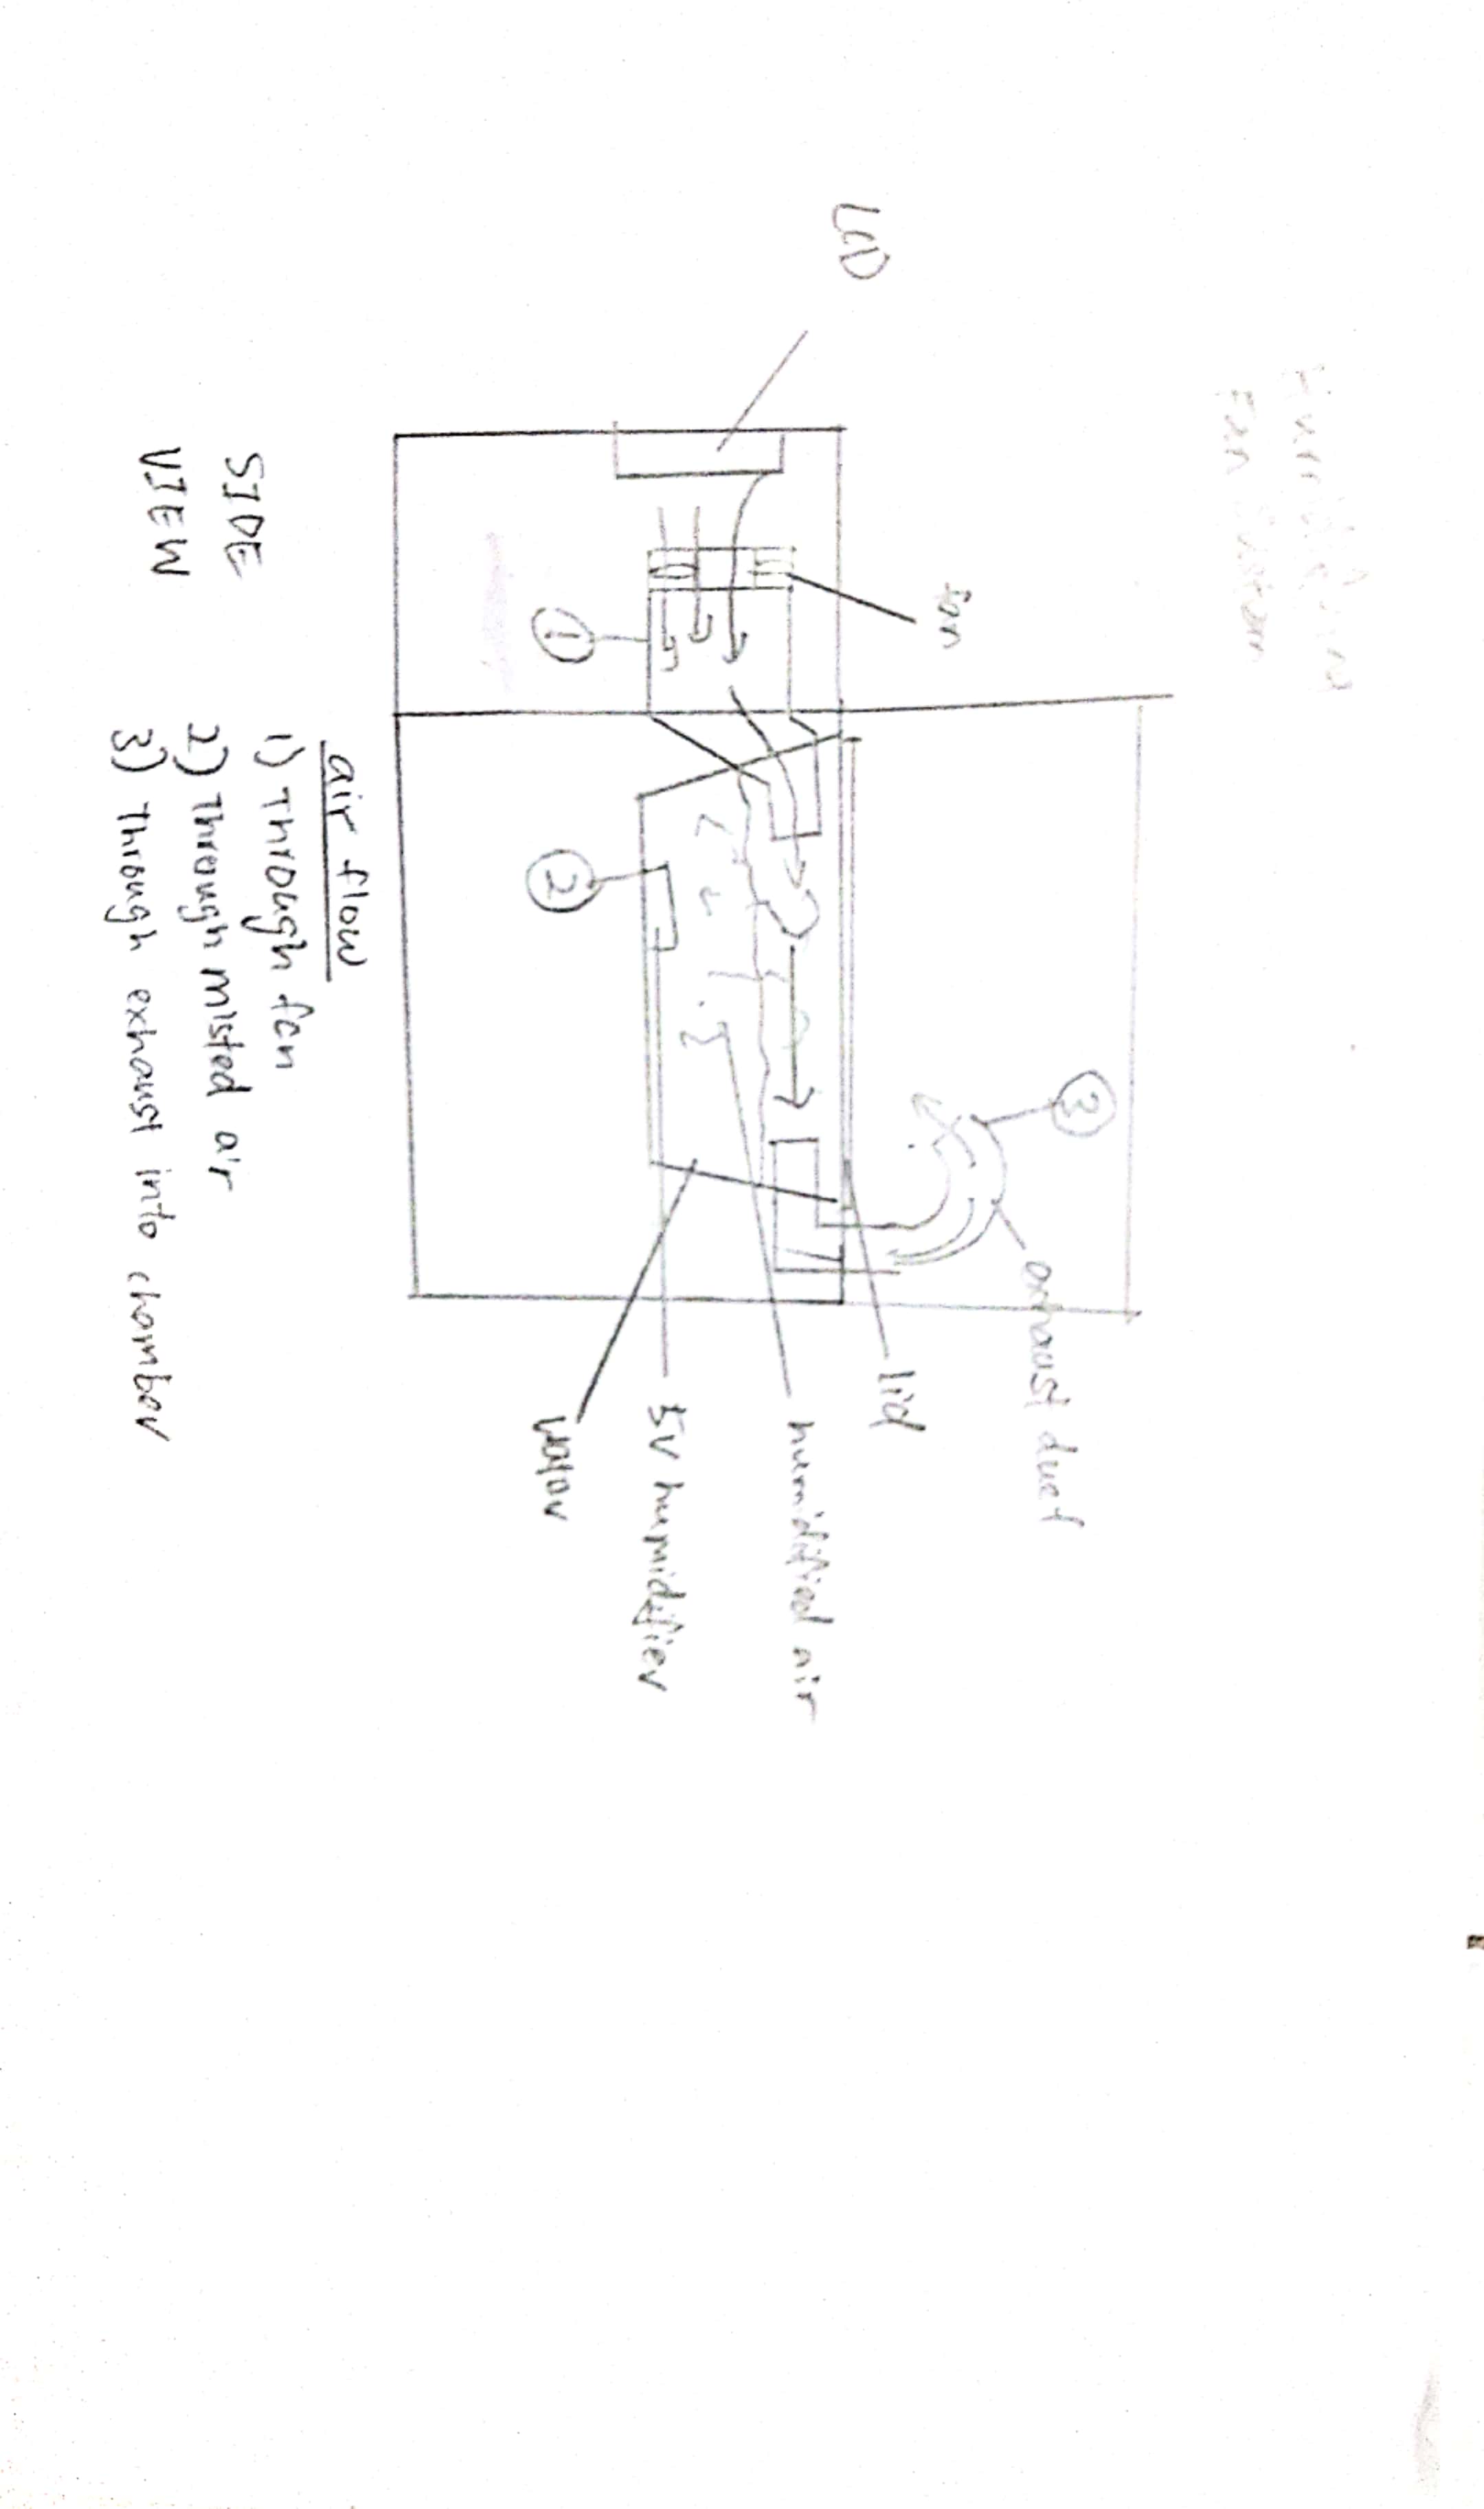
How It Works
The planter has an internal reservoir inside it that holds water to water the plant and also to provide the humidifier water to make mist. There is a DHT11 Temperature and humidity sensor that measures the humidity levels in the enclosure.The microcontroller uses the information and controls the fan and mister to turn on when the humidity is lesser than the set point.
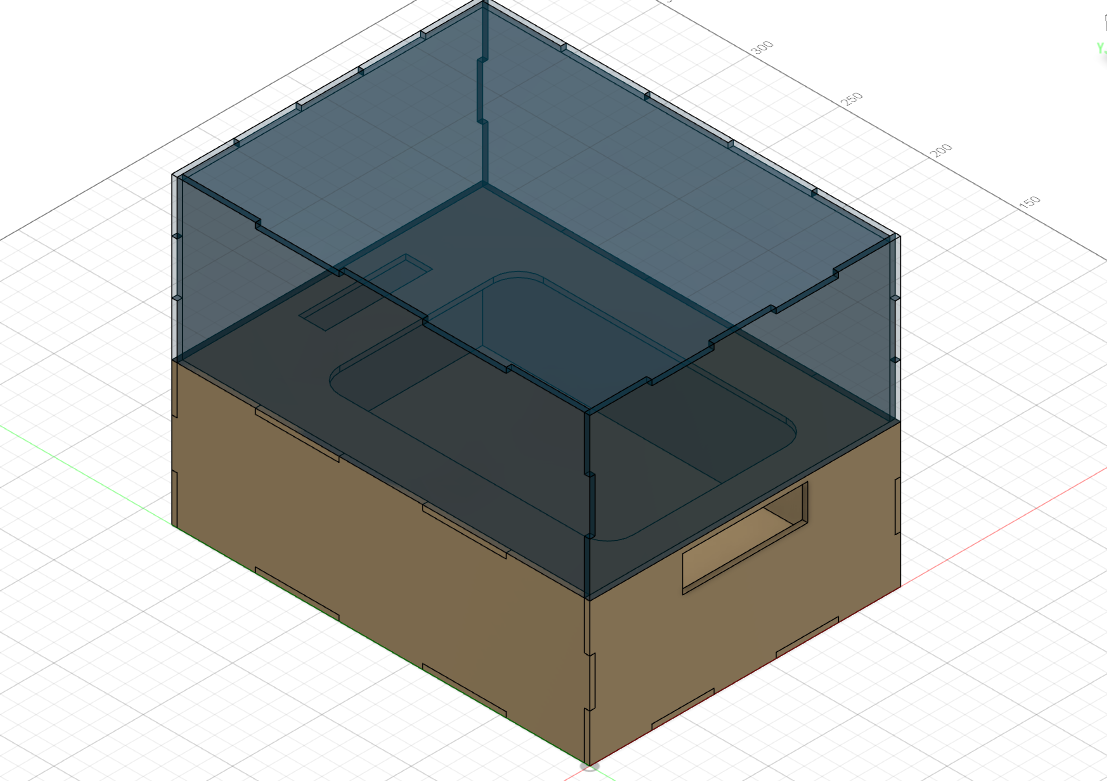
3D design
I designed the model in Fusion 360 . I first designed the laser cut parts first. Followed by the 3D Printed parts. You can use your mouse and drag and interact with the window to check out the project.
DownloadThe file is an assembly that contains all the components used in the design< the black component are 3D printed while the clear top is acrylic and the bottom enclosure is lasercut plywood
3D Printing
The 3d printed parts are printed with PLA with the ultimaker 2+ 3d Printer
Programming
This is the whole assembly of the project , 3D printed parts are black in color while laser cut parts are brown in color
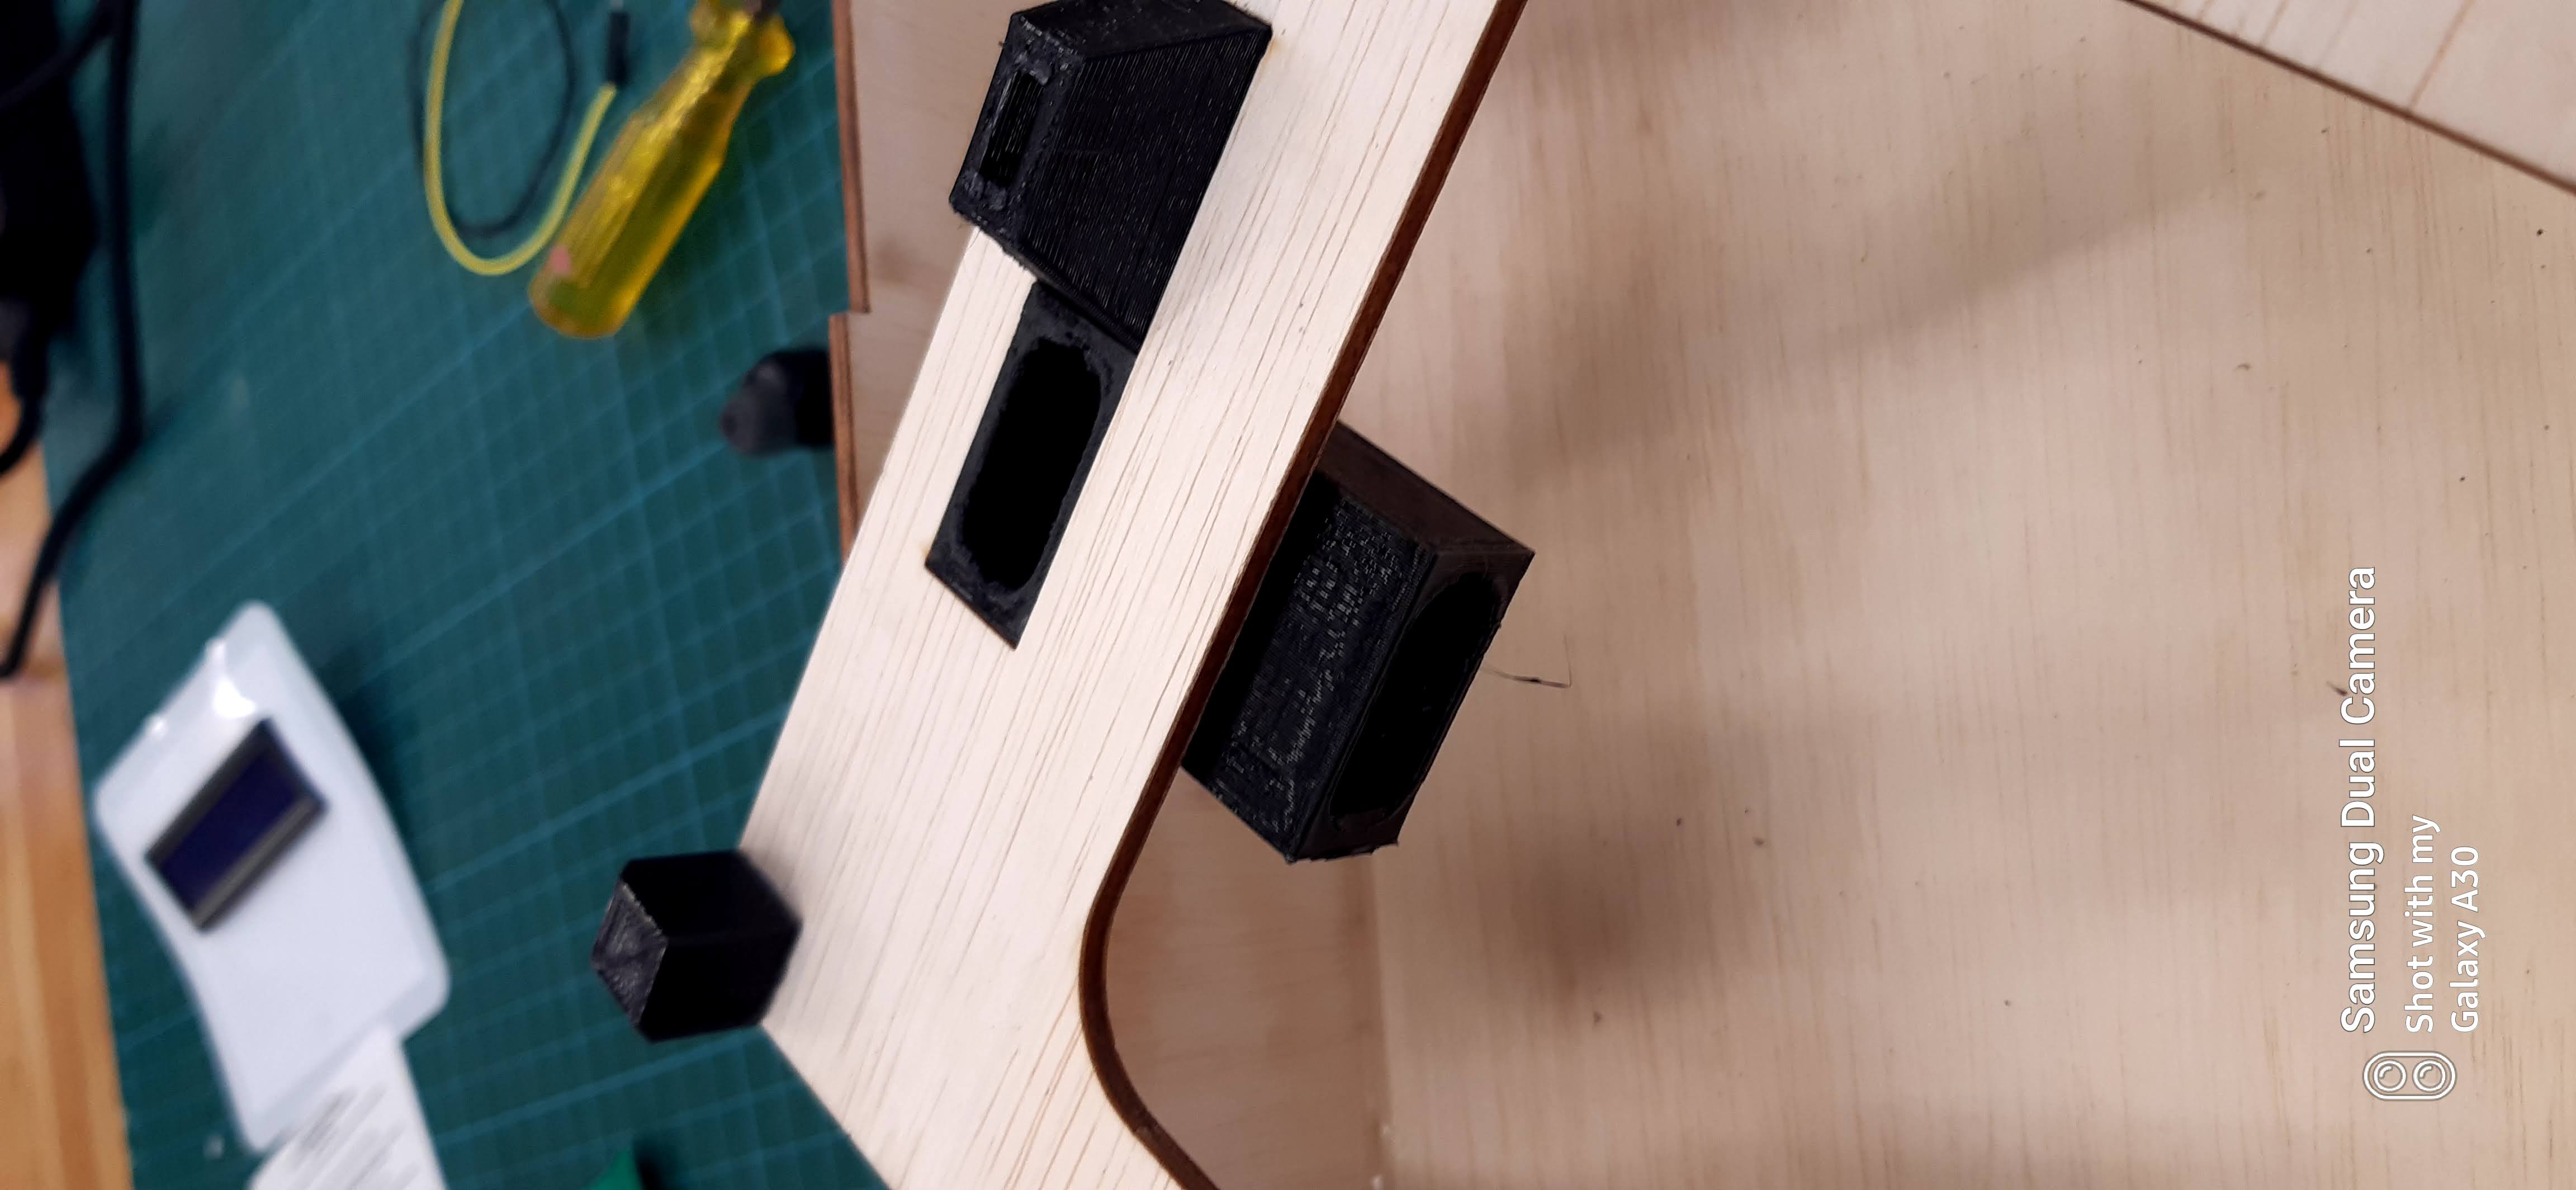
Components

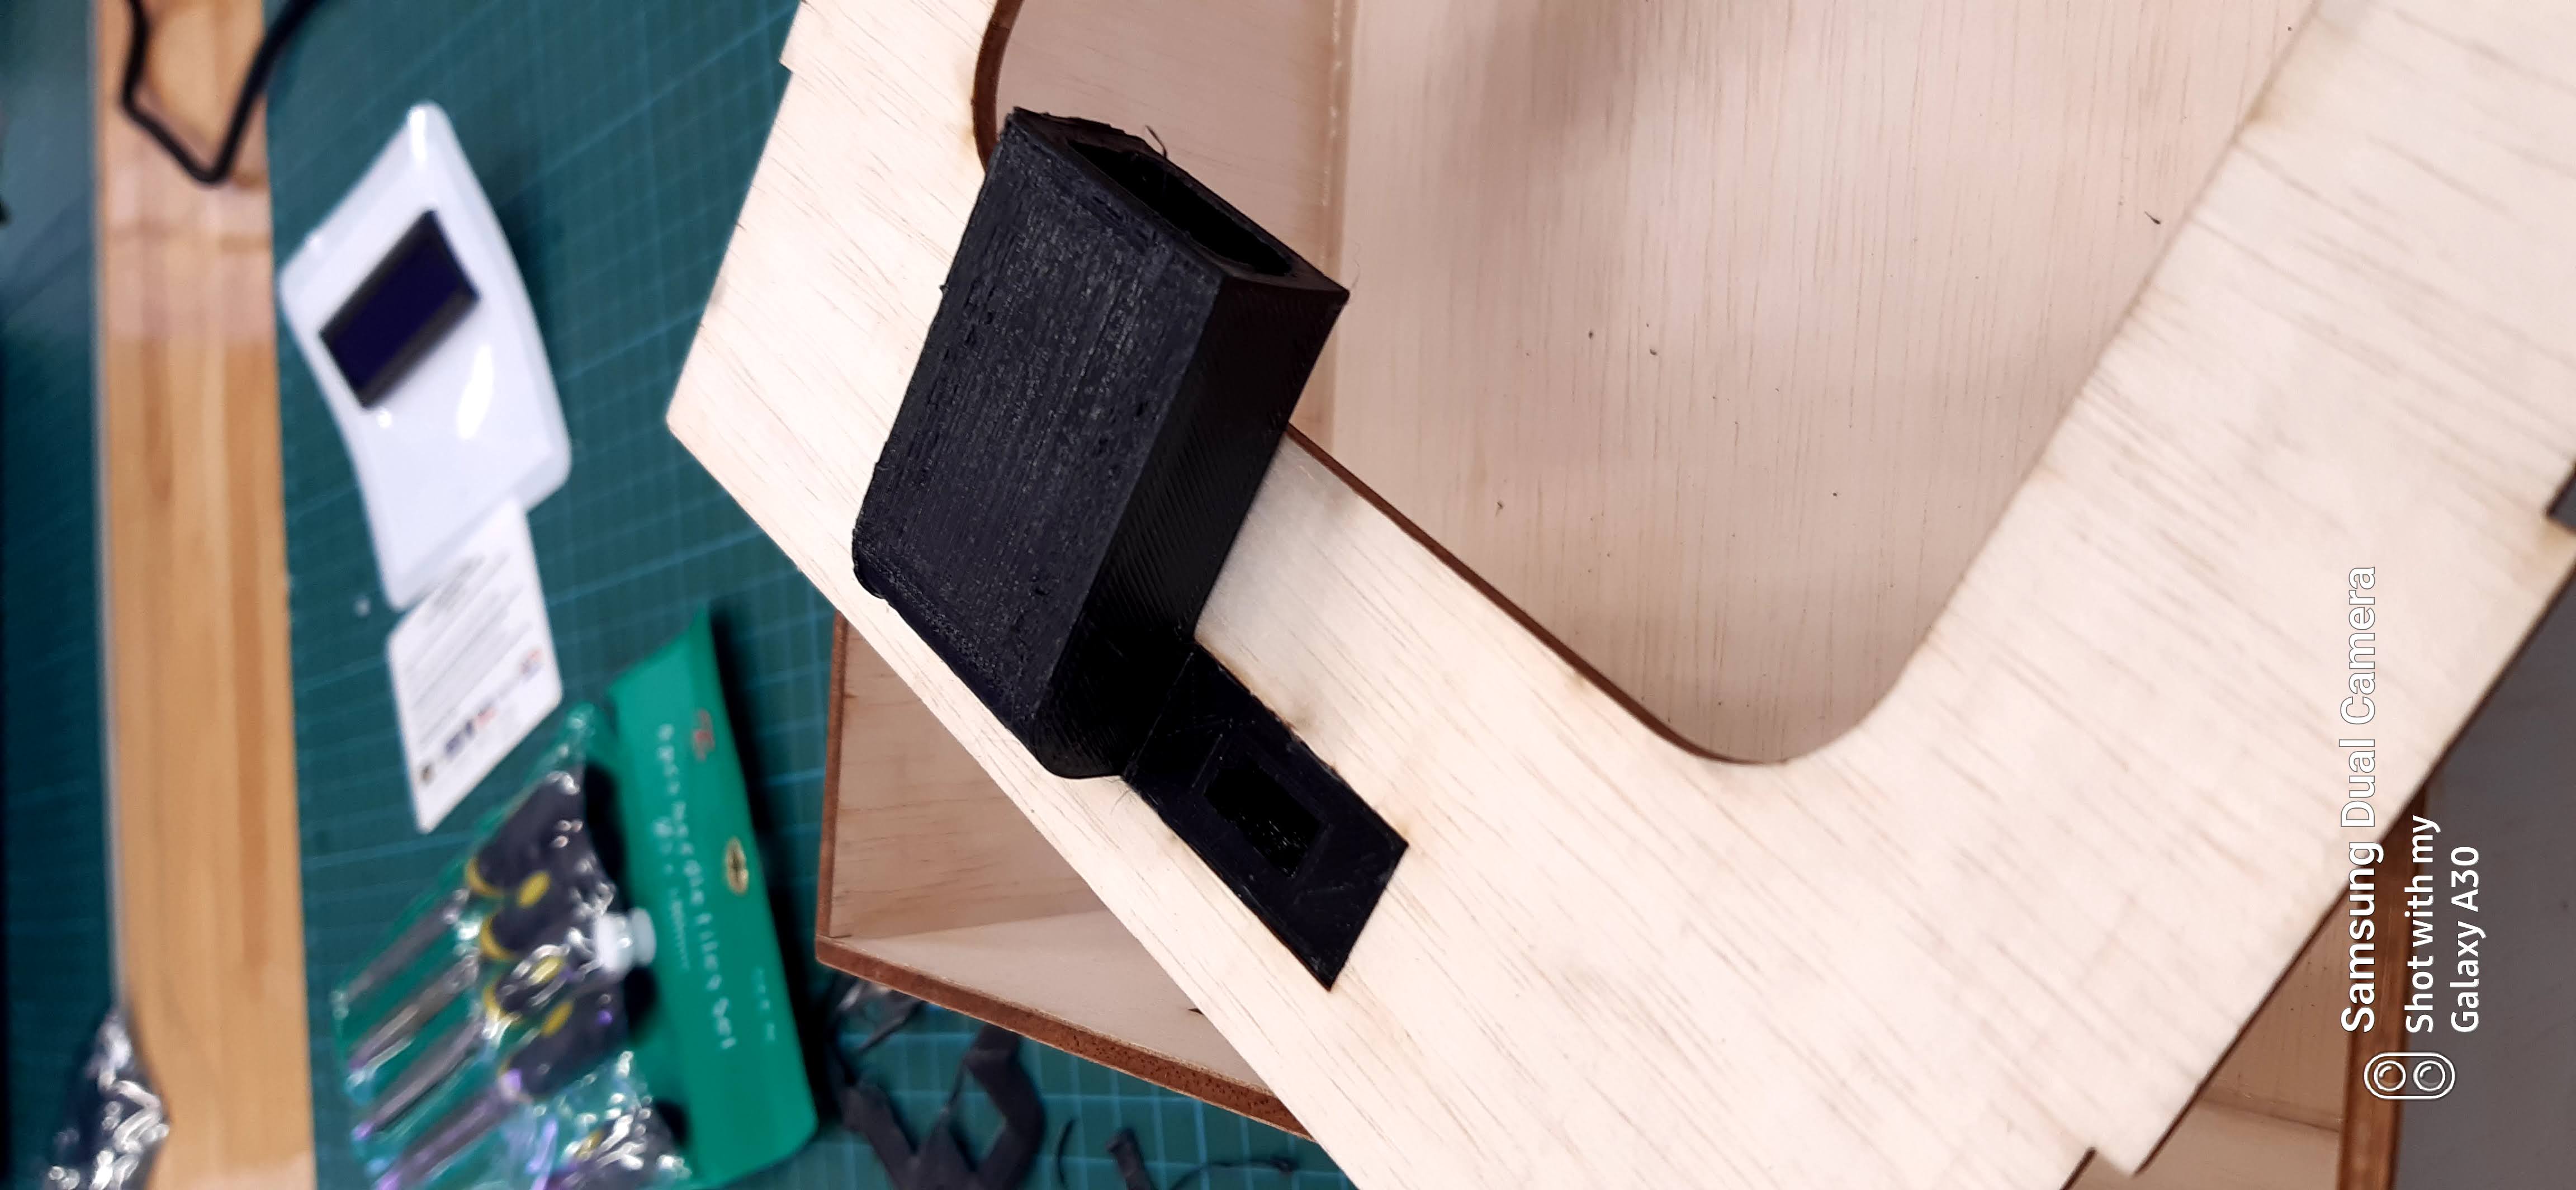
Fan Duct
The Fan Duct's main purpose is to deliver the mist into the enclosure
Sensor Shroud
The sensor shroud holds the DHT11 Module for humidity monitoring of the enclosure
Edge Stay
The edge stay prevents the acrylic top enclosure from sliding off
Electronics Enclosure
This is where the electronics is housed in
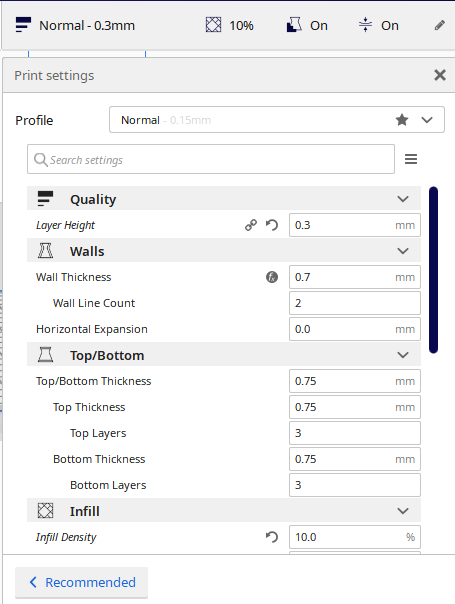
Special Settings for 3D printing
I used Ultimaker Cura as my Slicer software,As for 3D printing the settings that i used are
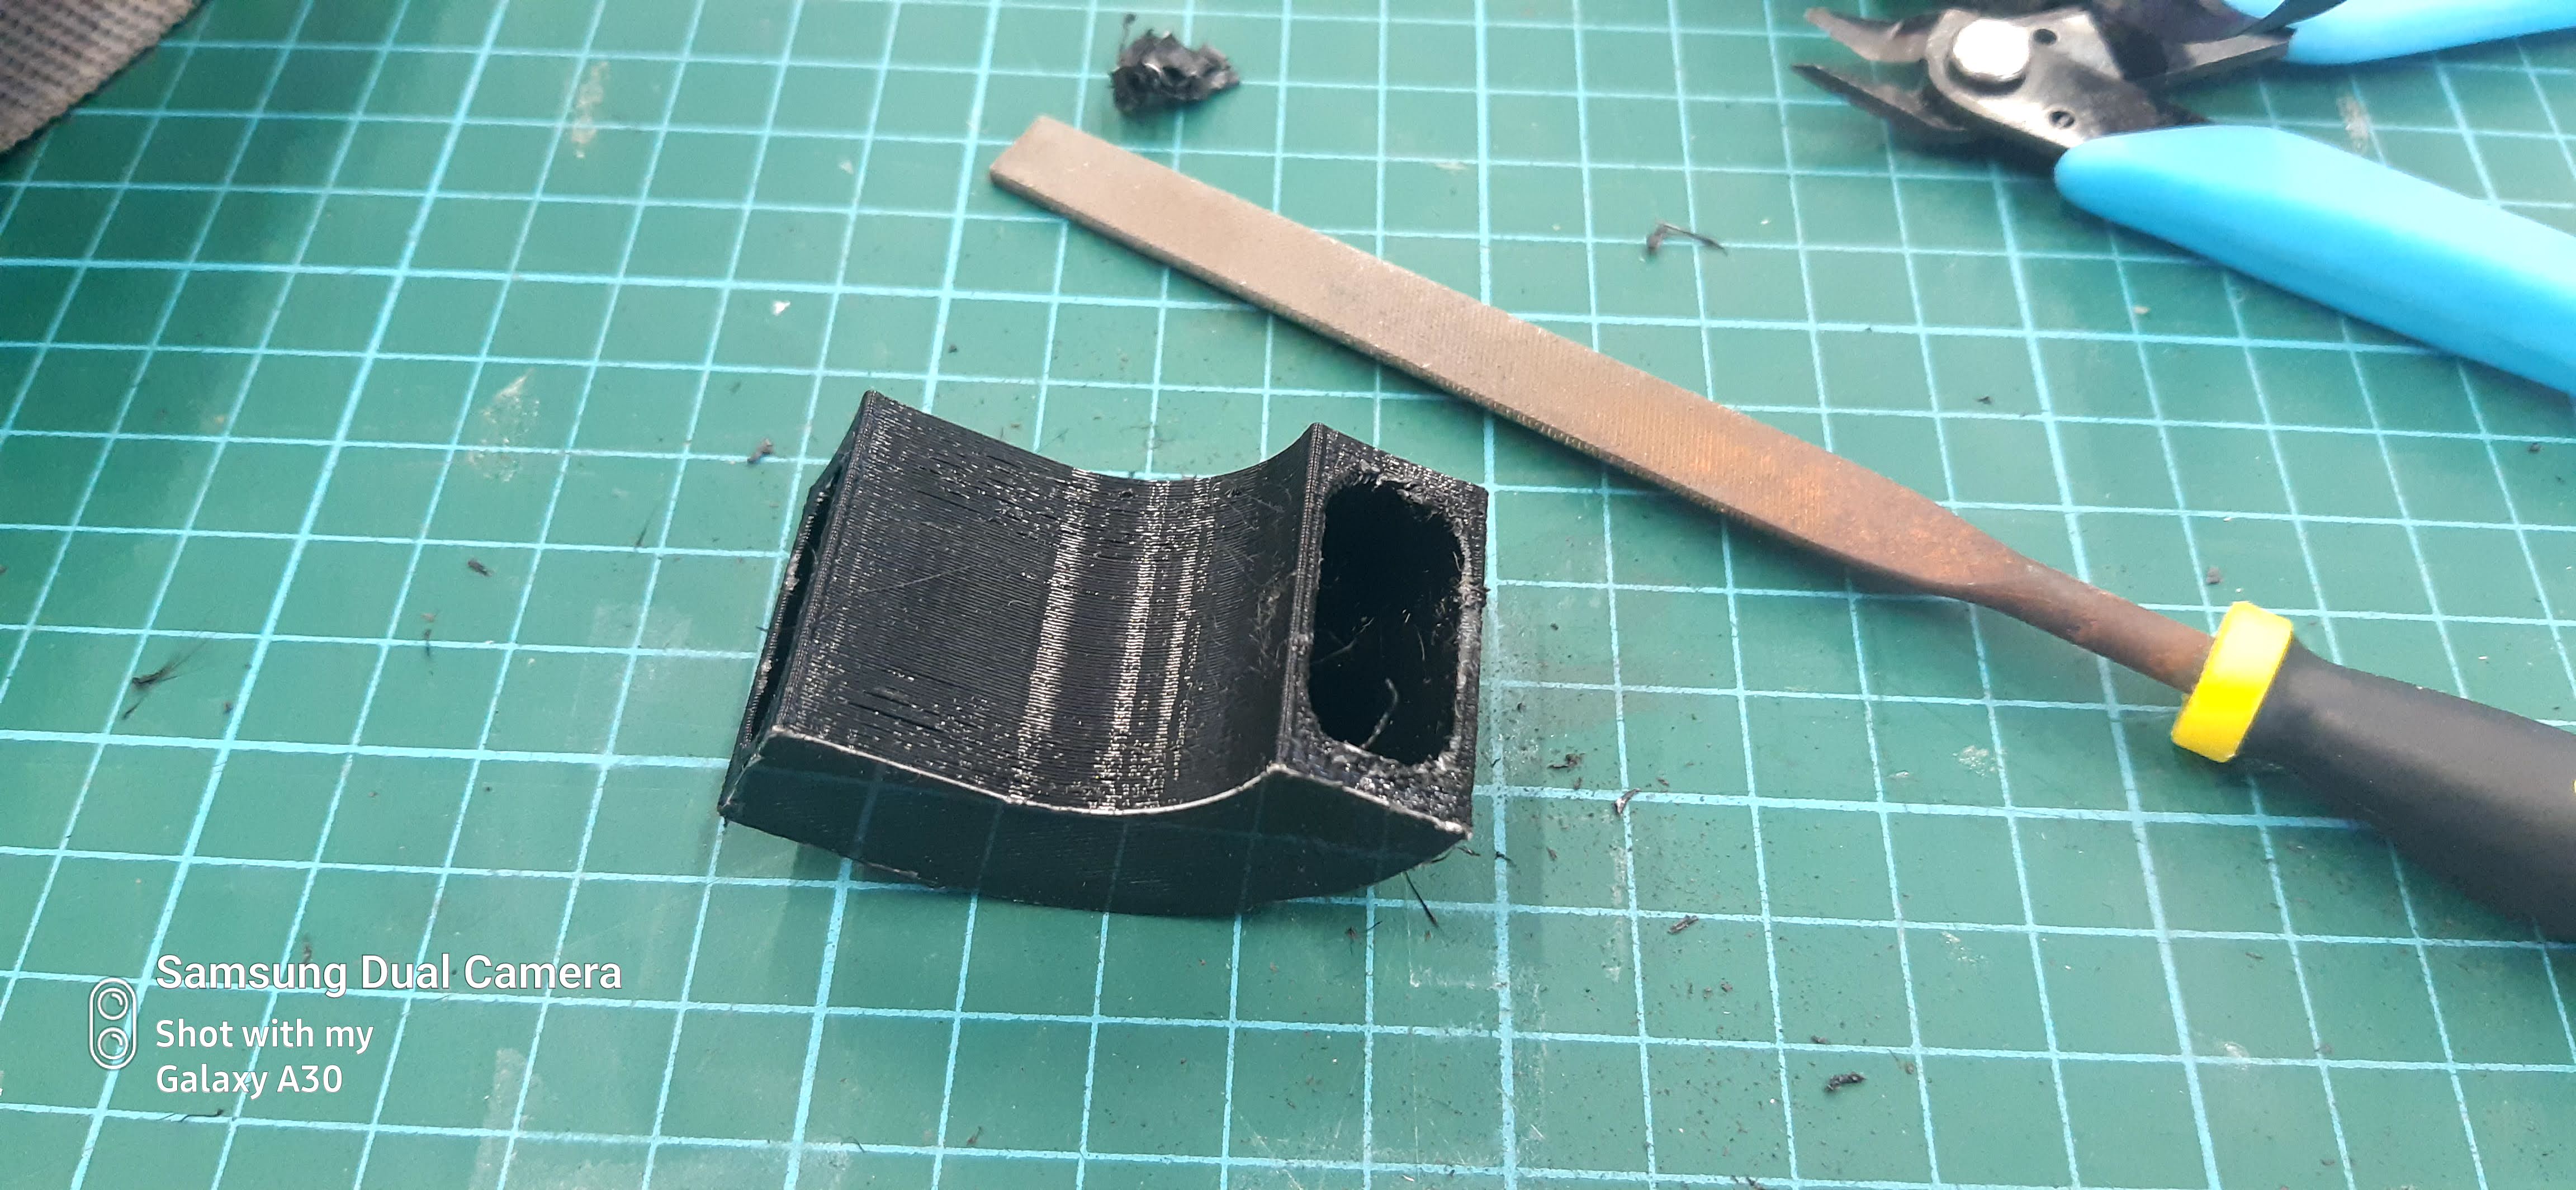
As for components like the Fanducts, it contains slots that are specially designed to have rounded corners, this allows of the printin gwithout of the supports
However, i needed to print supports just in case, due to how thin the components are. due to the internal slot, i used concentric supports that do not obstruct the entry and exit of the duct
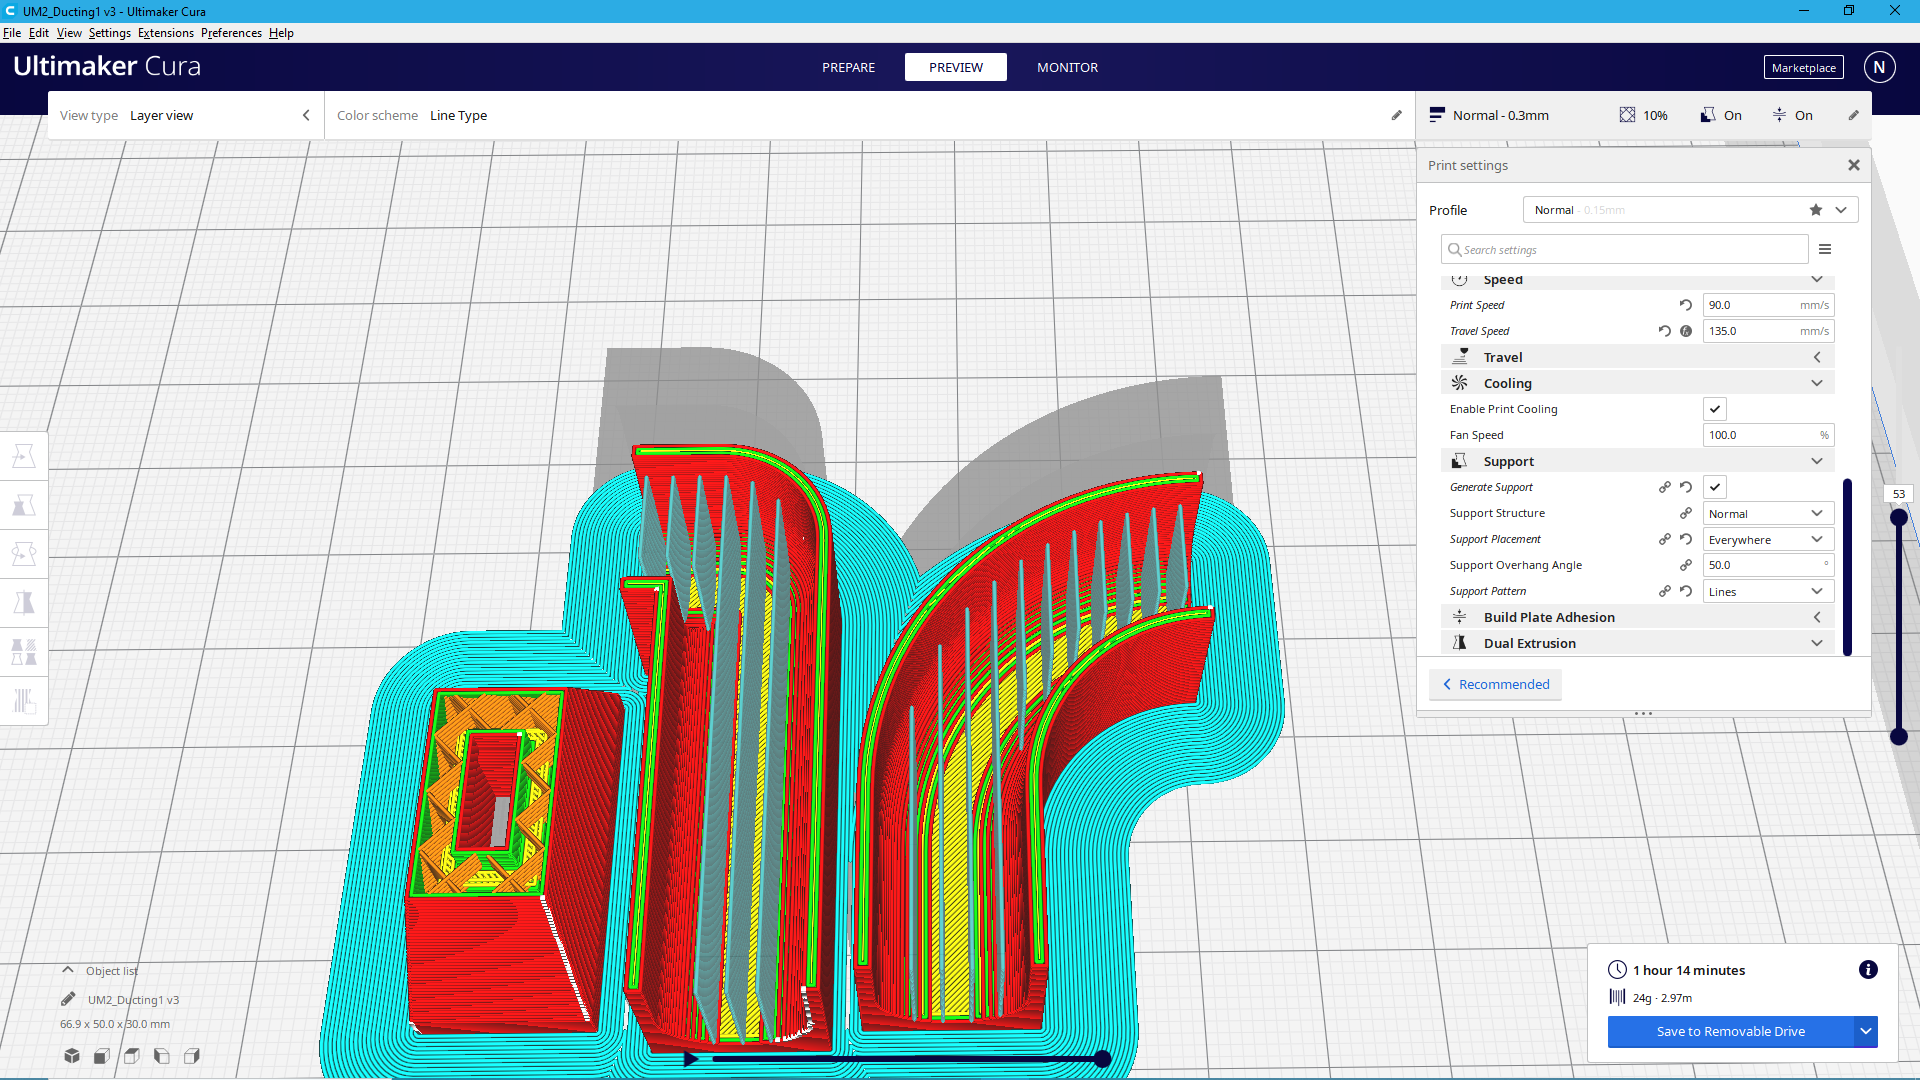
the support structure does not obstruct the openings in the event where the support is difficult to remove
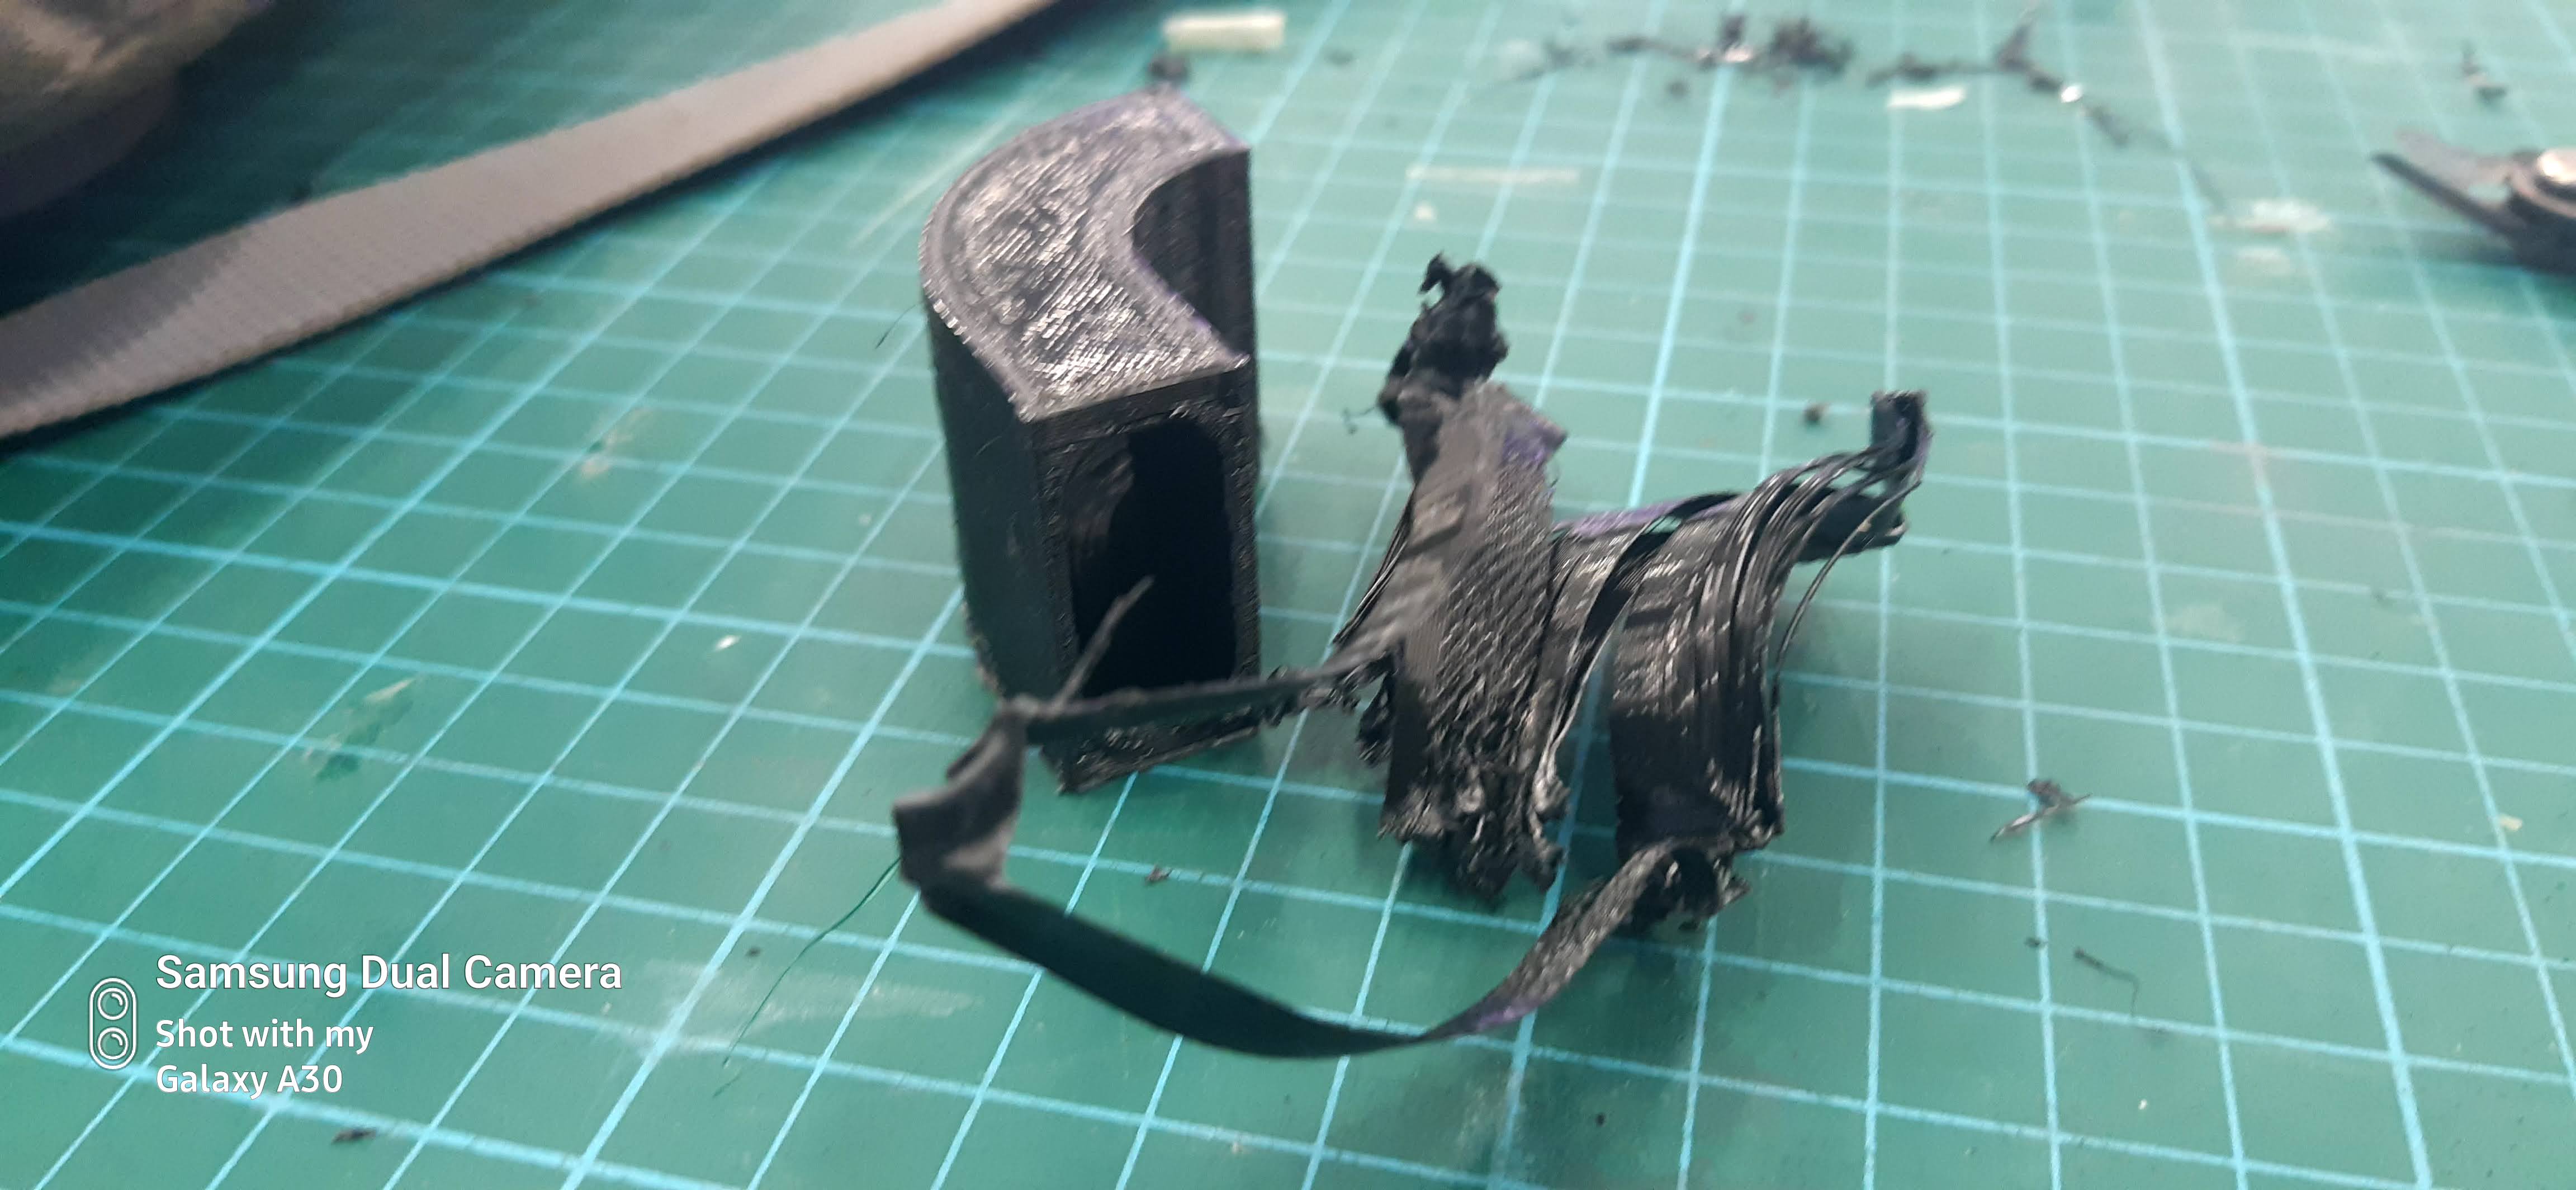
luckily due to the concentric support structure, it is easy to remove the supports
Disclaimer
The fan shroud and the hinge are found on thingiverse as i already have it 3d printed prior to the project and is just using to reduce printing time and design
https://www.thingiverse.com/thing:2187167
as for the fan shroud, since i printed it a long time go i couldnt find the source files for it.
Stl files for 3d printed components
Download STL Files.GCODE for 3d printed components
Download .GCODE FilesLaser cutting
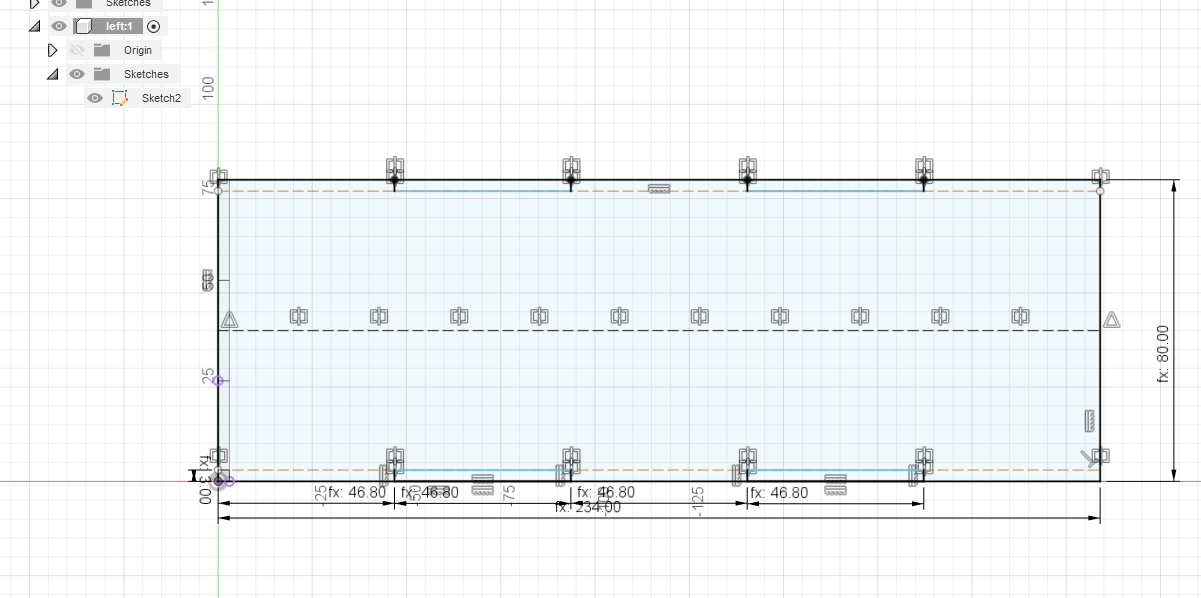
this is the part that i use for laser cutting the top enclosure is acrylic while the bottom is the plywood. After designing , i converted it to dxf files and proceeded to lasercut at the lab.
I designed the whole enclosure using the same method as my previous laser cut box with new dimension parameters

Creating tabs for the laser cut with parameters
 Download DxF Files
Microcontroller Programming
For the arduino i programmed it in C++
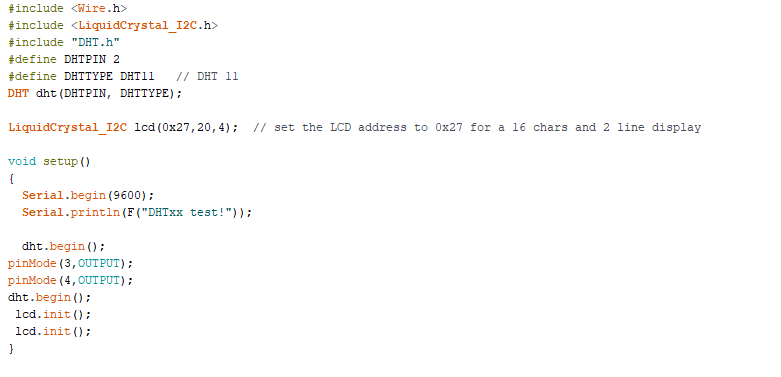
this is the initialisation program where i determine the pins of the DHT11, as well as the input of the 2 relay
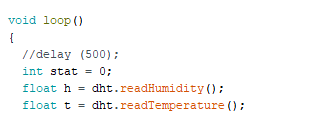
This is the part of the program where the arduino reads the humidity from the sensor itself and inserts these values into a variable

This is the part where it uses the variables and checks whether the humidity is below or above 60%,
using this , the arduino energises the relay notated by HIGH and LOW state
Download Programthe I/O assignments are as shown
- Relay 1 --> digital 3
- Relay 2 --> digital 4
- DHT11 Sensor --> digital 2
- I2C LCD -->(A5 and A4)
Electronics Wiring
In the Project i will be using:
- 24 volt ultrasonic mister
- 5v fan
- 2 relay module
- I2C LCD Module
- DHT11 Sensor
- Arduino Uno Microcontroller
I drew up a wiring diagram for the project
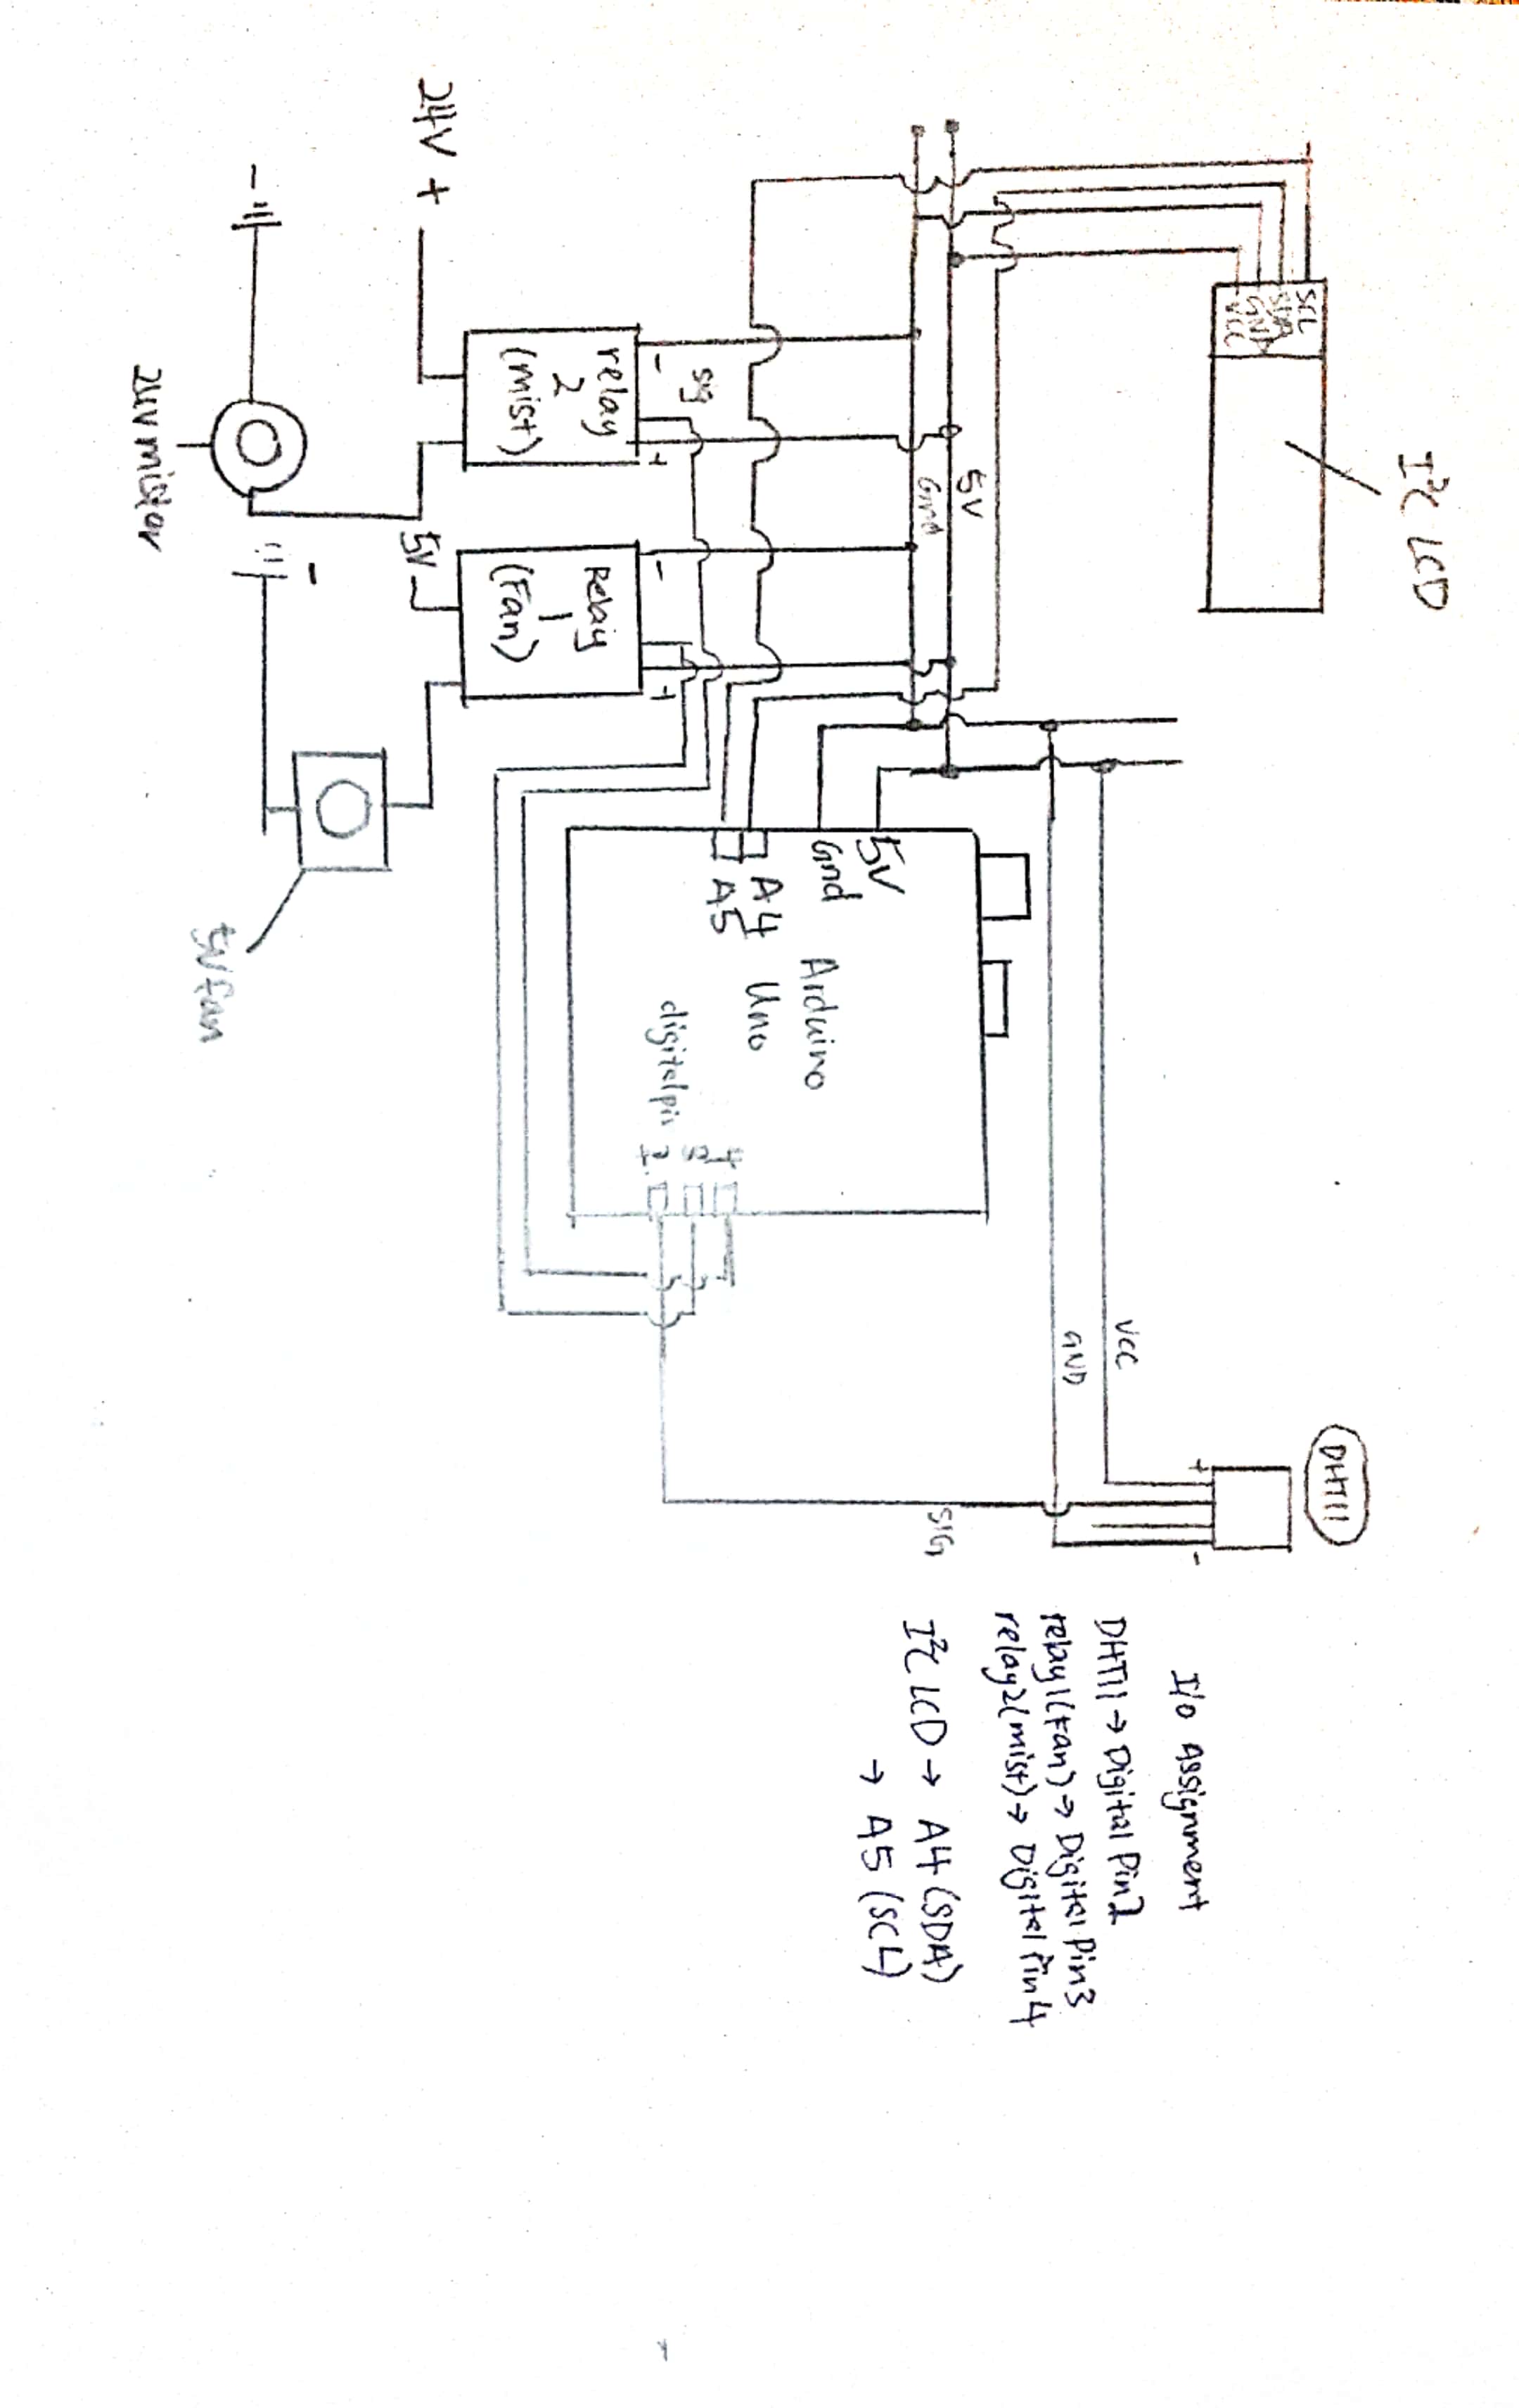
after that i took some time to complete the wiring of the circuit
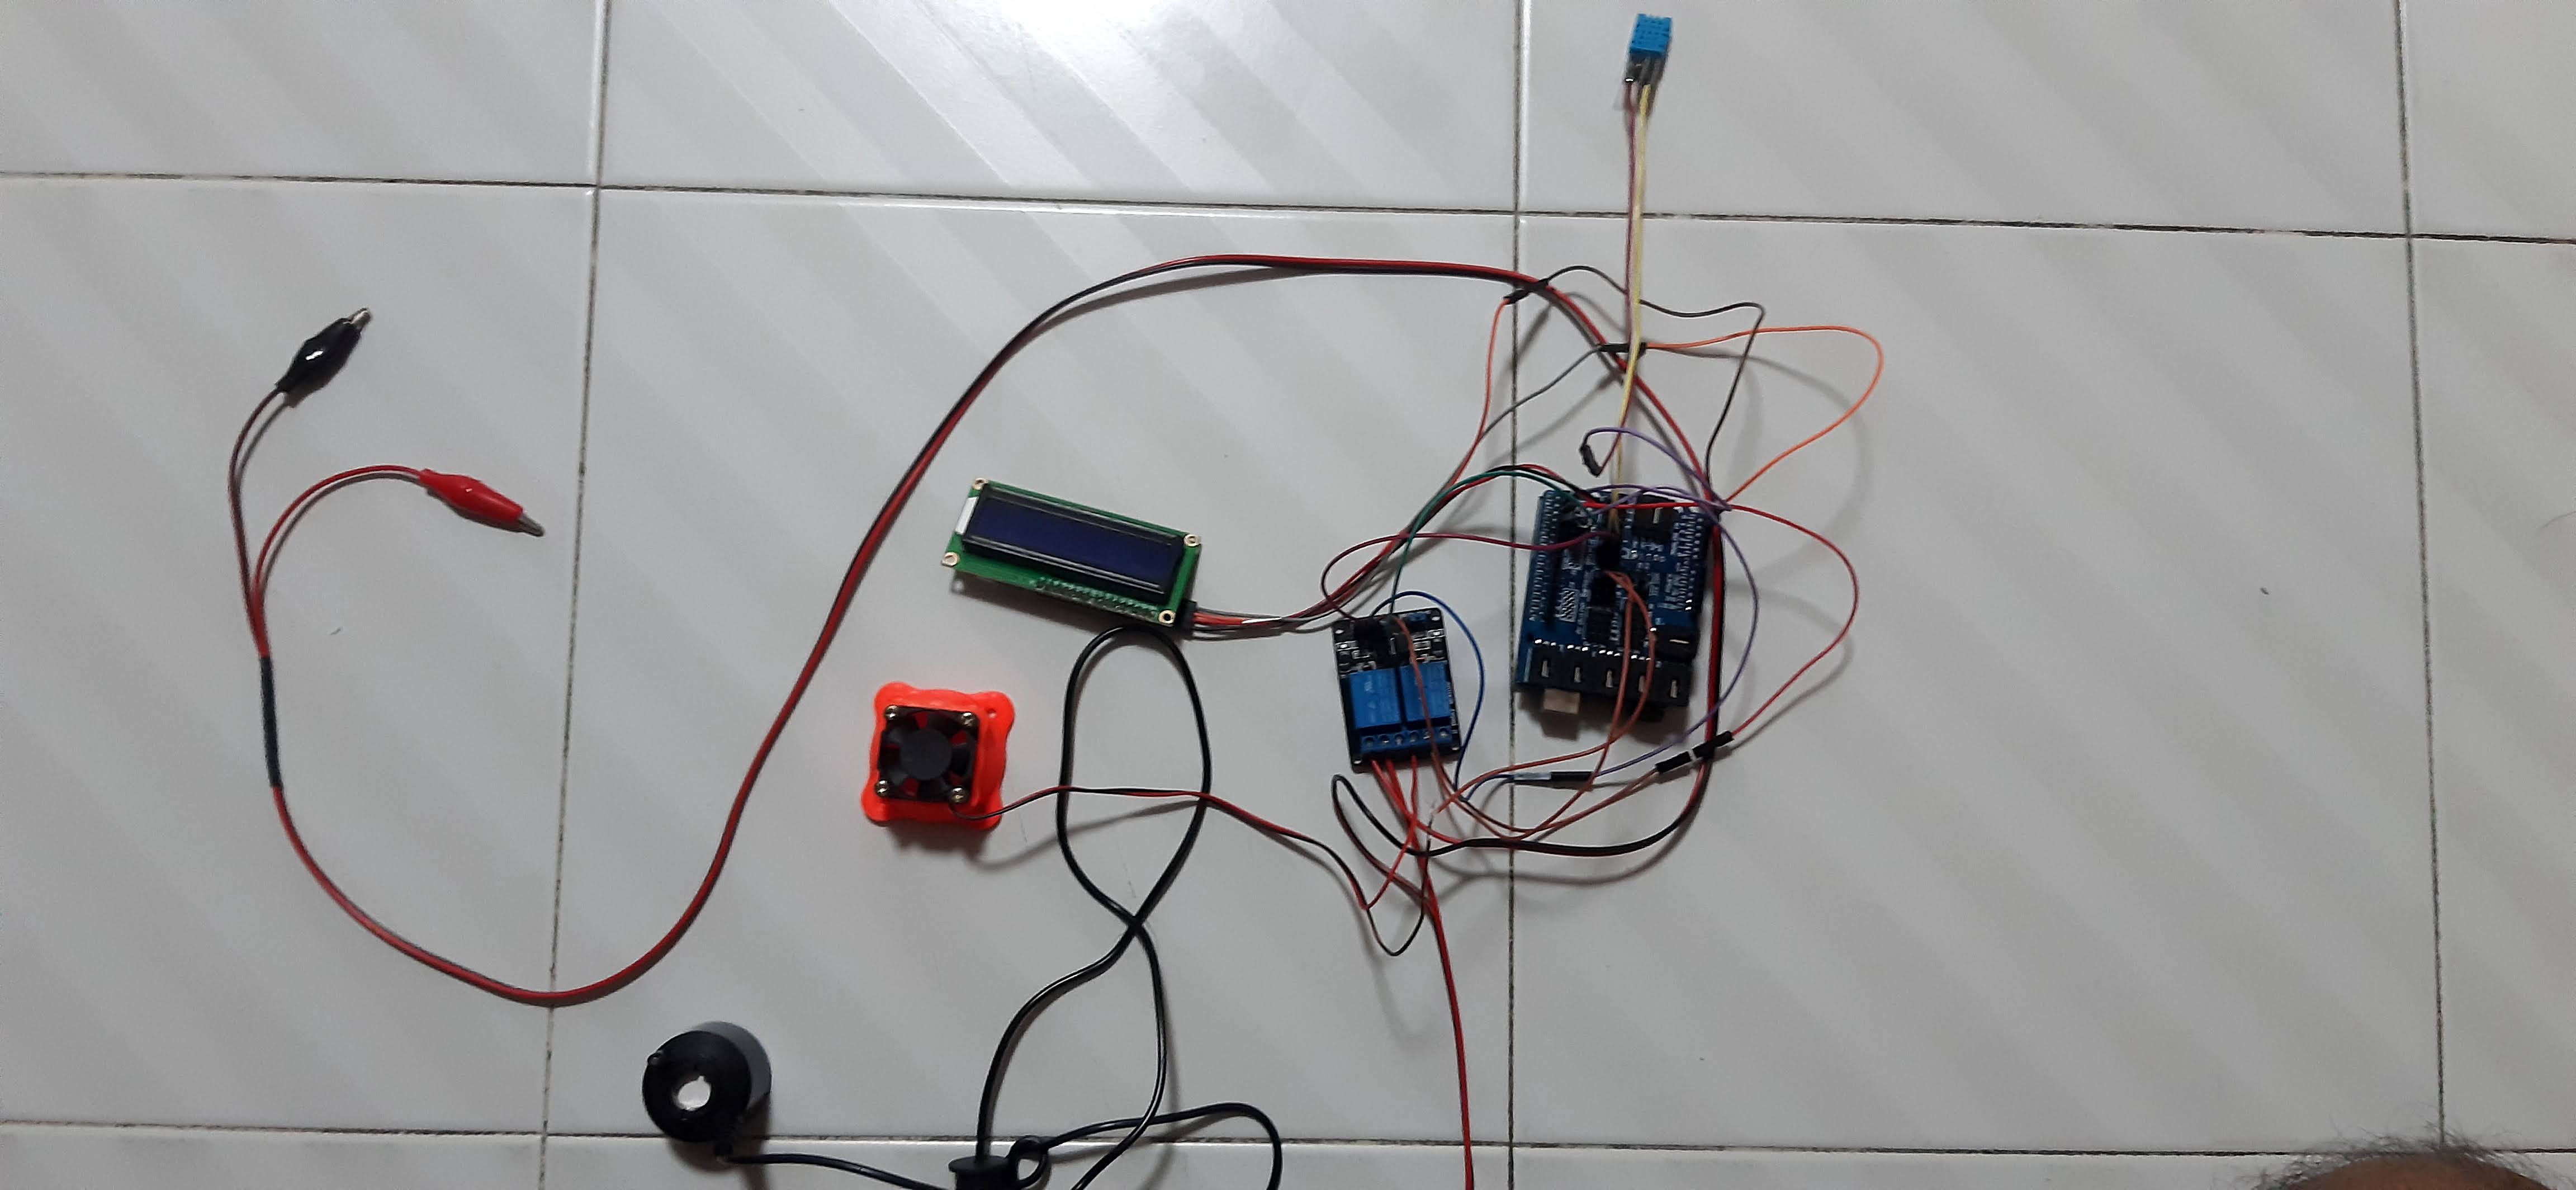
The 24v supply for the mister is connected to alligator clips for use in the Lab power supply, another connection is a 24v power plug wire that i have
Summary
Relay 1 controls 5v fan
Relay 2 controls 24v mister
Assembly/Integration
It is finally time for me to assemble the whole project, i have the 3D Printed parts, laser cut parts and the wiring of the system
As for the fan shrouds and other 3d printed compnents I hot glued them into place using a hot glue gun
the lasercut wood and acrylic top enclosure are also hot glues together in the photo
Next I needed to integrate the electronics
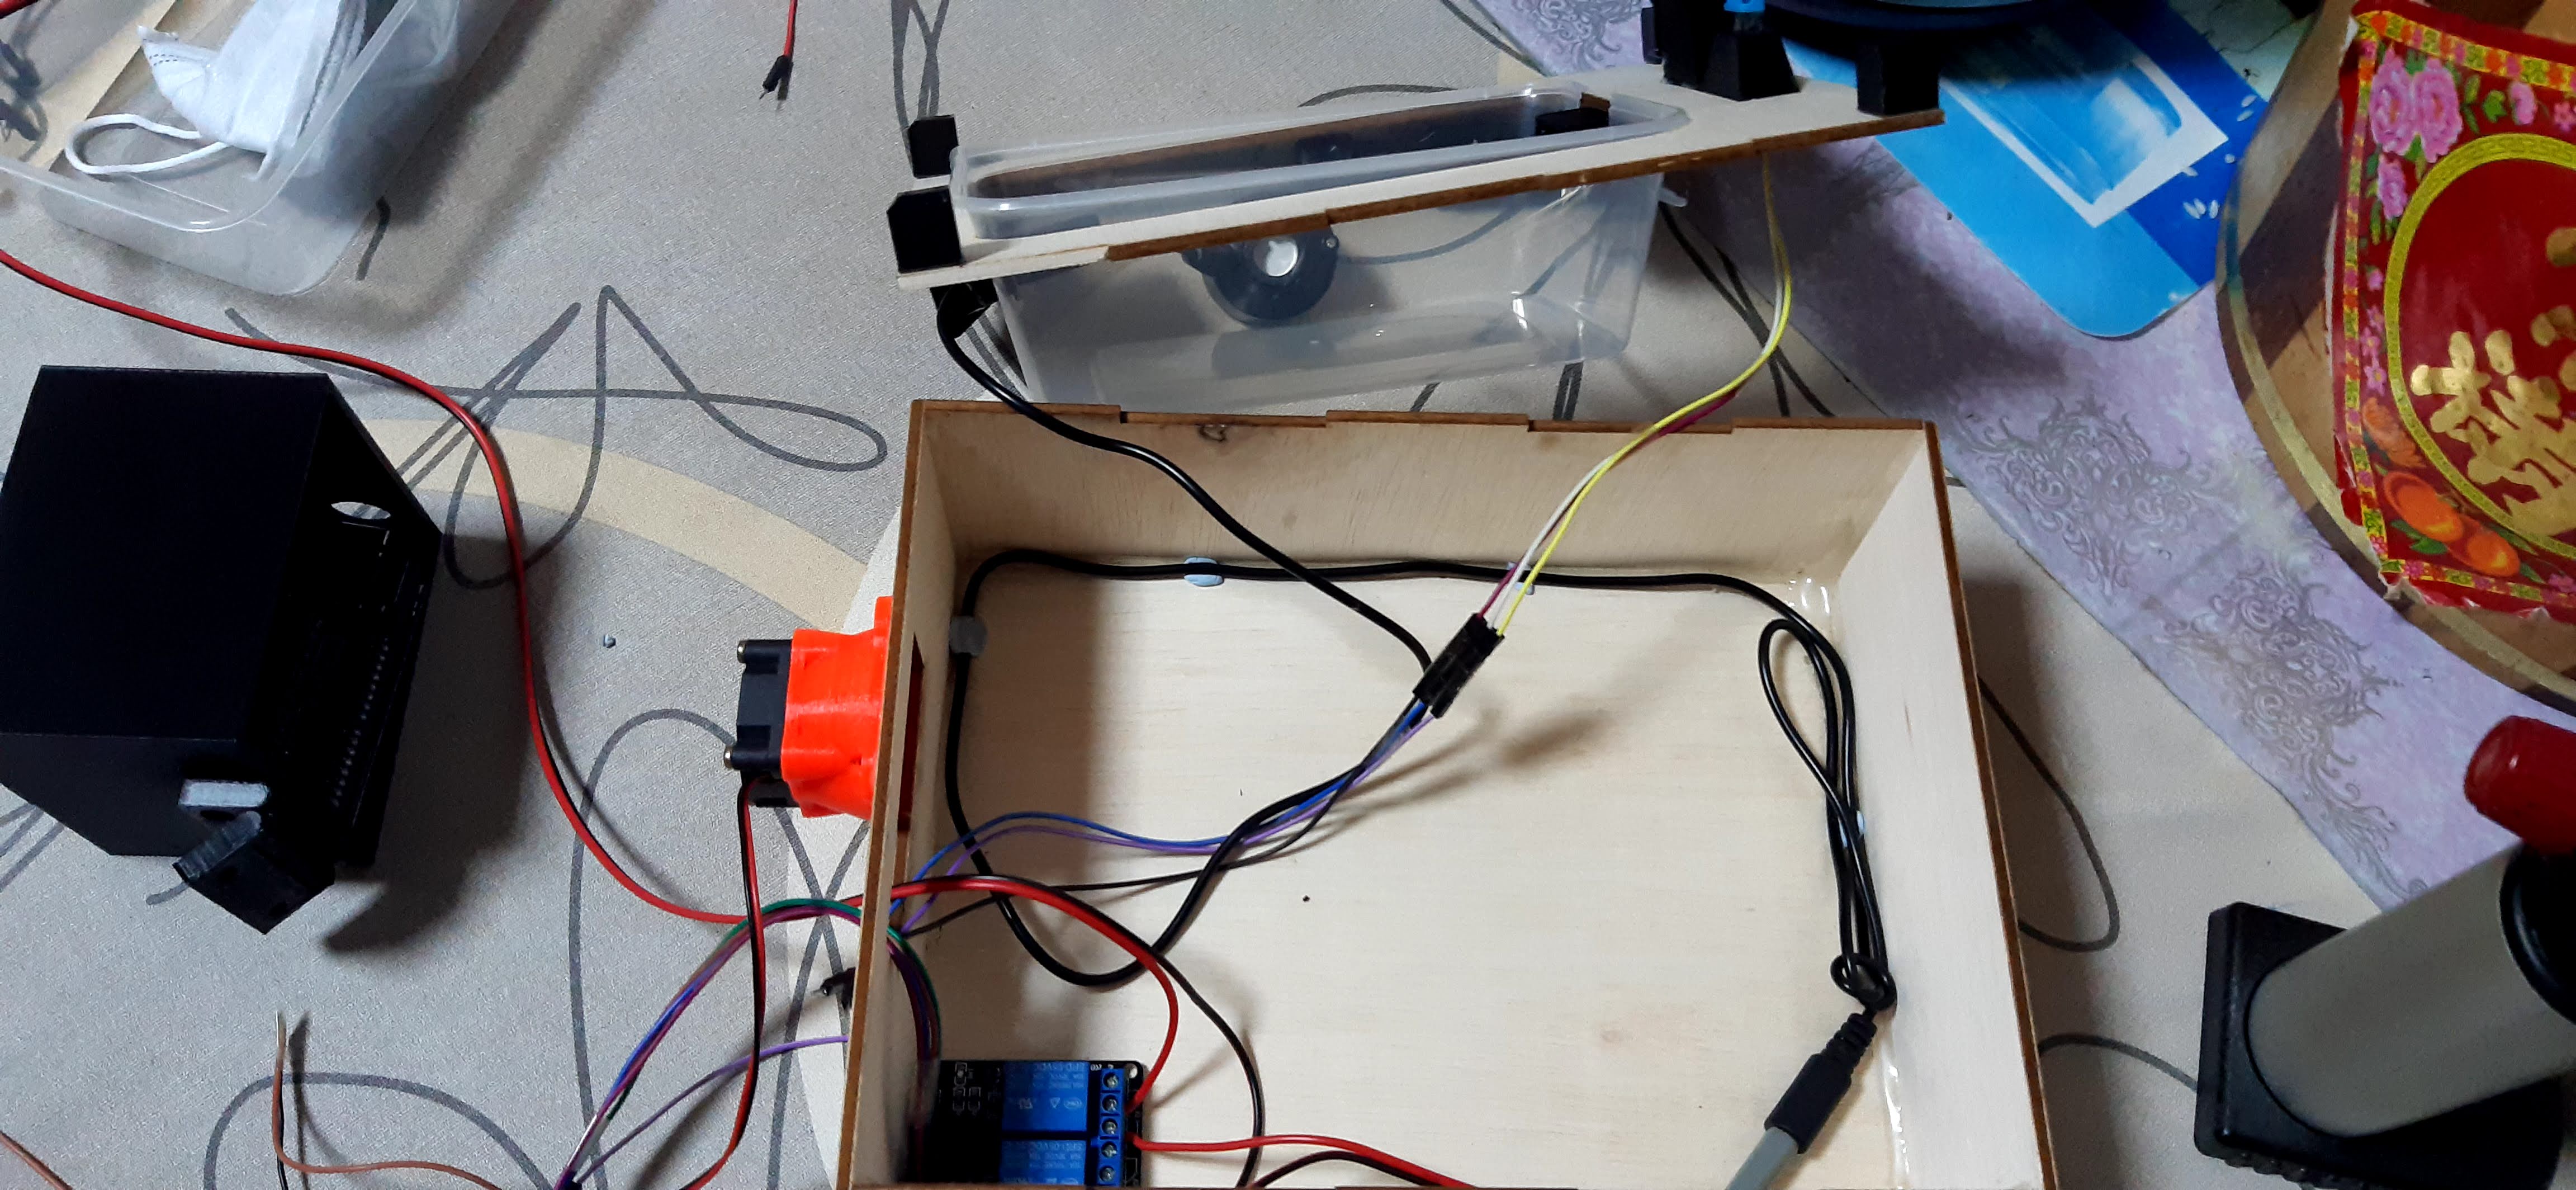
The bright orange PLA printed fan shroud is where the circulating fan is located, the black box houses all the electronics
after the electrical integration, it is time to add all the other components

this is the labelled iagram of where the components ar located, after this i proceeded with testing
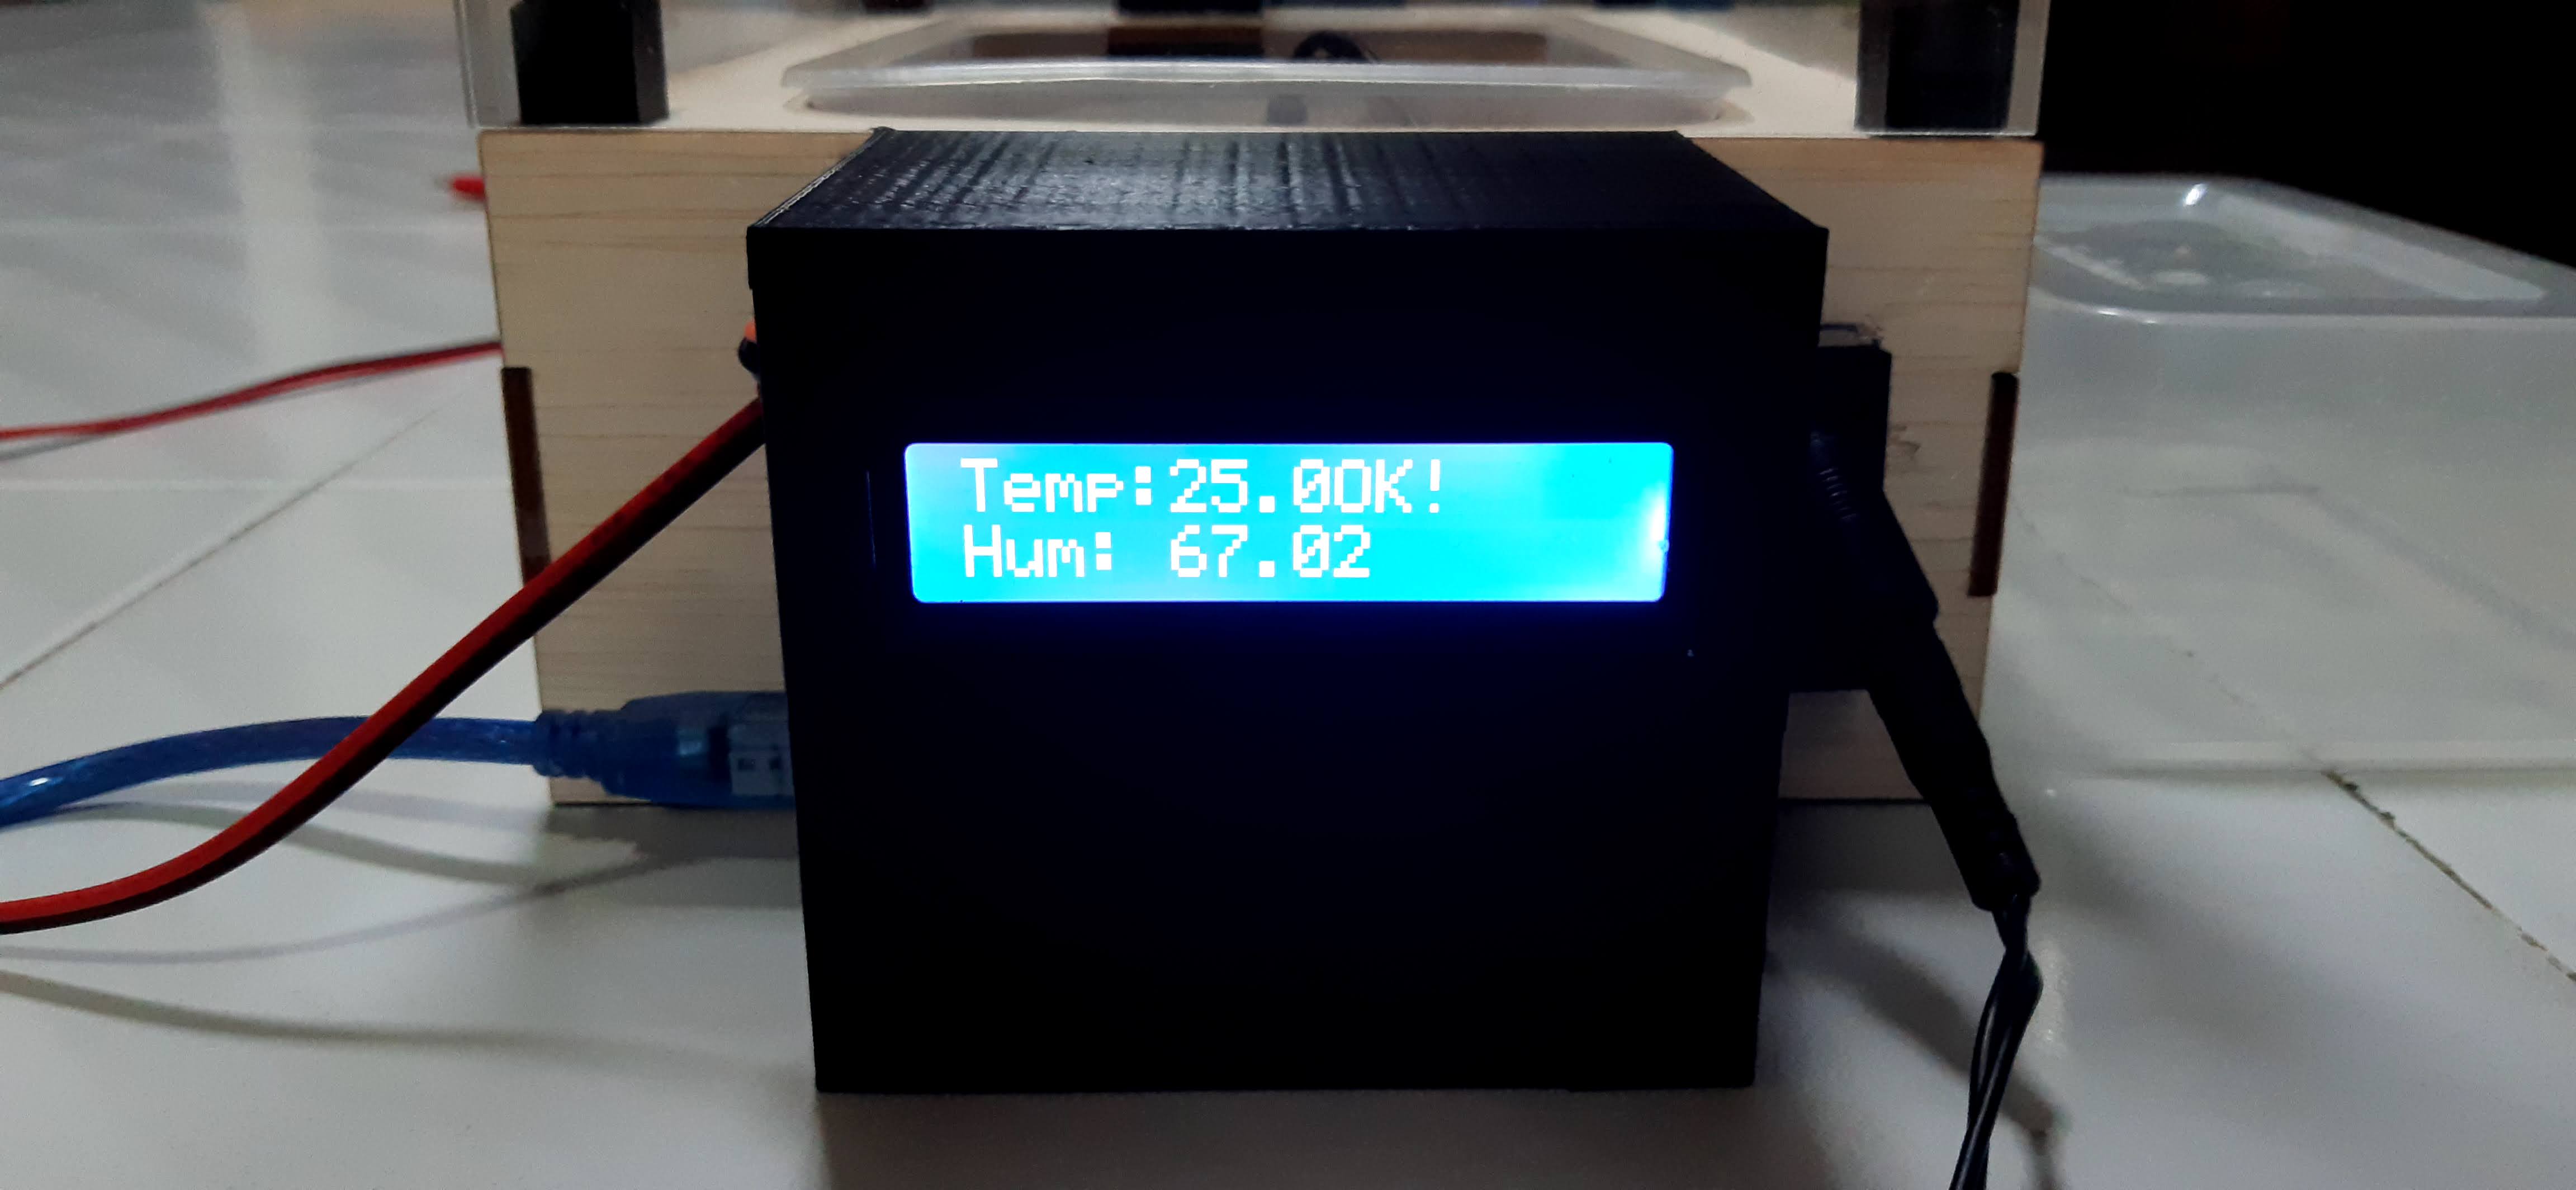
The LCD properly displays the temperature and humidity of the enclosure
Showcase video!
Any improvements?
Well there are several in mind, firstly i would like to use a 5v ultraonic mister so i can work in an entire 5 environment, reducing the need of a separate supply cable, i would like to also add a led light and maybe a ldr in the system. lastly i would also like to change the fan to a bigger fan so more air can be flowing into the misting chamber.
Final Thoughts
the project as a whole was very informative and opened my eyes in the ways of digital fabrication and prototyping, this no doubt will be used by me in the future